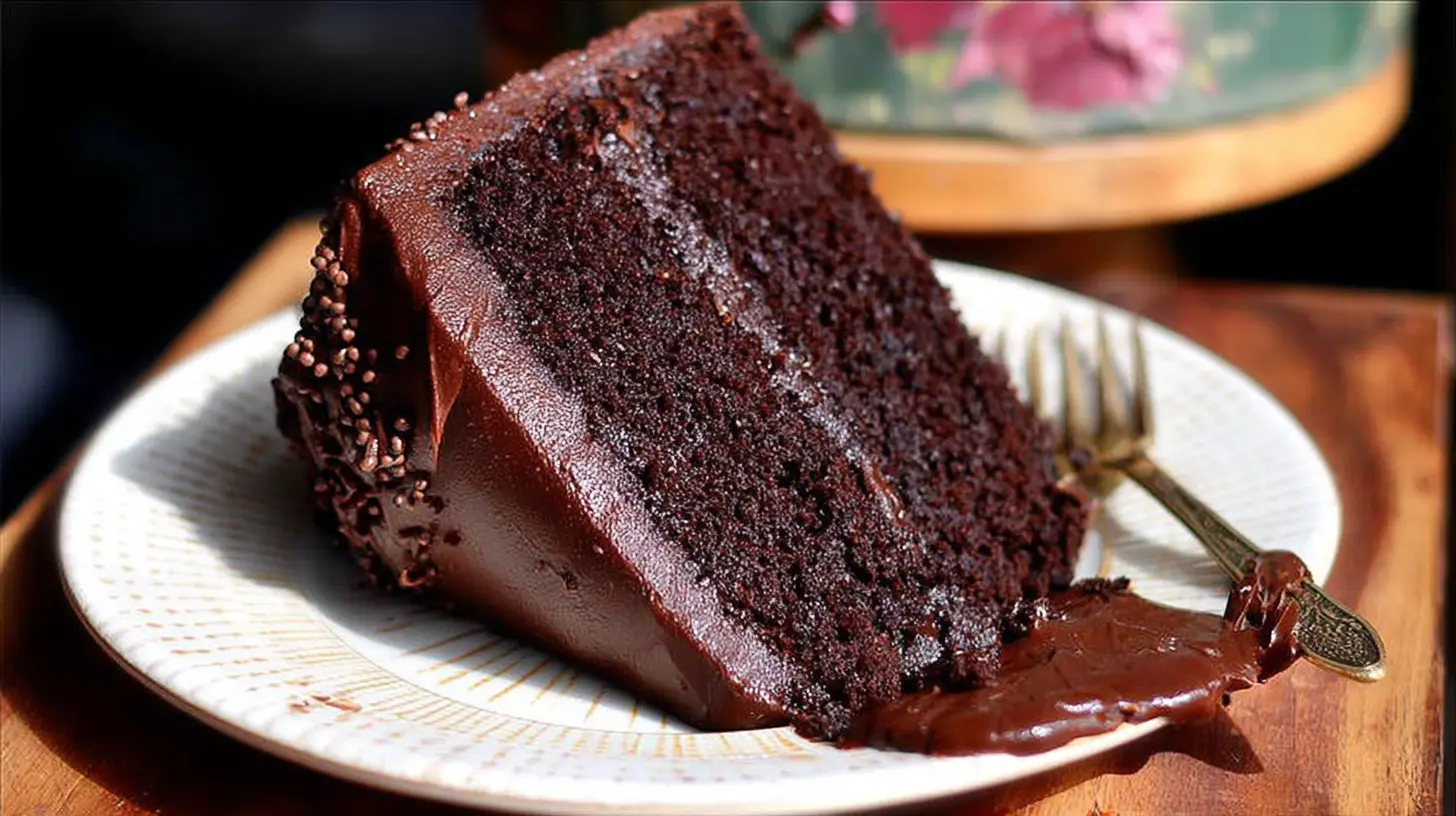
There’s something truly magical about a perfect chocolate cake. That first bite, the rich, deep cocoa flavor, the tender crumb that practically melts in your mouth… it’s pure gastronomic bliss. But, let’s be honest, achieving that perfection isn’t always a walk in the park. My kitchen has seen its share of chocolate cake disasters – sunken centers, dry edges, crumbly textures that defied all attempts at frosting. It was a journey of trial and error, but after countless experiments and a few minor meltdowns (pun intended!), I finally cracked the code to what I affectionately call my “No-Fail Chocolate Cake.” This isn’t just another recipe; it’s a culmination of everything I’ve learned to ensure your chocolate cake dreams come true every single time.
What Makes This Recipe Special?
You might be thinking, “Another chocolate cake recipe? What makes this one different?” Well, for starters, this isn’t just a recipe; it’s a toolkit for success. It addresses those common pitfalls that can turn a joyous baking experience into a frustrating one. We’re not just aiming for a decent cake here; we’re aiming for that deeply satisfying, moist, and intensely chocolatey creation that will have everyone asking for your secret. Whether you’re a seasoned baker or just starting, this guide is designed to empower you with the knowledge to consistently bake a show-stopping chocolate cake. It’s perfect for a celebratory birthday, a comforting weeknight dessert, or simply when that insatiable chocolate craving hits.
> “I used to dread making chocolate cake because it always turned out dry. These tips changed everything! My family can’t get enough of this cake now.” – Happy Baker
The Cooking Process Explained
Before we dive into the nitty-gritty, let’s get a bird’s-eye view of how this No-Fail Chocolate Cake comes together. You’ll start by whisking together the dry ingredients, ensuring they’re well combined. In a separate bowl, the wet ingredients – including that all-important hot liquid – will be mixed. The magic truly happens when these two come together, forming a smooth, luxurious batter. After a quick bake in the oven, you’ll have a perfectly risen, fragrant chocolate cake, ready for cooling and your favorite frosting. It’s a straightforward process, but it’s the thoughtful details and specific techniques we’ll cover that elevate it from good to absolutely glorious.
What You’ll Need
Gathering your ingredients beforehand is key to a smooth baking process. This recipe uses common pantry staples, but quality matters for that depth of flavor.
Dry Ingredients:
- All-purpose flour: The backbone of our cake.
- Granulated sugar: Provides sweetness and contributes to moisture.
- Unsweetened cocoa powder: Use good quality for rich chocolate flavor. Dutch-processed is often preferred for darker color and mellower taste.
- Baking soda & baking powder: Our leavening agents, crucial for a light, airy crumb.
- Salt: Balances the sweetness and enhances chocolate flavor.
Wet Ingredients:
- Large eggs: For structure and richness.
- Milk: Adds moisture and helps tenderize the cake.
- Vegetable oil: Contributes to a super moist crumb. You can also use canola oil or another neutral-flavored oil.
- Vanilla extract: A must-have for complementing chocolate.
- Hot water or hot brewed coffee: This is one of the “secret weapons” for a moist cake and really deepens the chocolate flavor.
Directions to Follow
Let’s get baking! Follow these steps carefully for your perfect No-Fail Chocolate Cake.
- Prep Your Pans & Preheat: Preheat your oven to 350°F (175°C). Grease and flour two 8 or 9-inch round cake pans. You can also line the bottoms with parchment paper for extra insurance against sticking.
- Combine Dry Ingredients: In a large bowl, whisk together the flour, sugar, cocoa powder, baking soda, baking powder, and salt until thoroughly combined. This ensures even distribution of leavening agents.
- Mix Wet Ingredients: In a separate medium bowl, whisk together the eggs, milk, vegetable oil, and vanilla extract until well blended.
- Combine Wet and Dry: Pour the wet ingredients into the dry ingredients. Mix on low speed with an electric mixer, or by hand with a whisk or rubber spatula, until just combined. Be careful not to overmix; overmixing can lead to a tough cake.
- Add Hot Liquid: Gradually add the hot water or hot coffee to the batter, mixing on low speed until just incorporated. The batter will be quite thin – don’t worry, this is normal and contributes to the moistness!
- Fill Pans & Bake: Divide the batter evenly between the prepared cake pans. Bake for 30-35 minutes, or until a wooden skewer or toothpick inserted into the center comes out with only moist crumbs, not wet batter.
- Cool: Let the cakes cool in the pans on a wire rack for 10-15 minutes. Then, invert them onto the wire rack, remove the pans, and allow the cakes to cool completely before frosting. Frosting a warm cake is a recipe for disaster!
Best Ways to Enjoy It
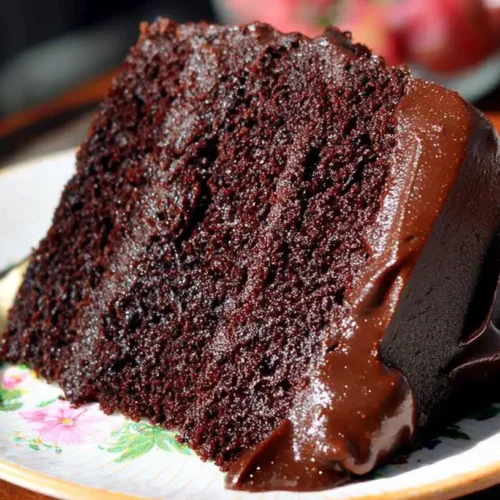
This No-Fail Chocolate Cake is a star on its own, but serving it thoughtfully can elevate the experience even further. The classic pairing is a rich chocolate buttercream frosting or a velvety ganache. For a touch of elegance, consider a raspberry coulis drizzled around the plate, or fresh berries like strawberries or raspberries piled high. A dusting of confectioners’ sugar or a simple dollop of freshly whipped cream can also do wonders. For a truly decadent treat, a scoop of vanilla bean ice cream melting alongside a warm slice is pure heaven. You could even serve it alongside a strong cup of coffee or a glass of red wine, as the deep chocolate notes pair beautifully.
Keeping Leftovers Fresh
Proper storage is key to enjoying your delicious chocolate cake for days to come. If unfrosted, wrap individual cake layers tightly in plastic wrap and store them at room temperature for up to 2 days, or in the freezer for up to 2 months. If frosted, especially with a dairy-based frosting like cream cheese frosting, store the cake in an airtight container in the refrigerator for up to 3-4 days. For buttercream-frosted cakes, an airtight container at room temperature is usually fine for 2-3 days, though refrigeration will extend its freshness. To reheat, simply bring slices to room temperature, or microwave for 10-15 seconds for a slightly warm, gooey treat. Always ensure the cake is completely cooled before storing to prevent condensation.
Pro Chef Tips
I learned these tips the hard way, so you don’t have to! Incorporating these into your baking routine will virtually guarantee success.
- Measure Accurately: Baking is a science. Use a kitchen scale for flour and sugar if you can, or at least the “spoon and level” method for flour (spoon flour into measuring cup, then level off with a straight edge).
- Room Temperature Ingredients: Eggs, milk, and any dairy should be at room temperature. This allows them to emulsify better, leading to a smoother, more uniform batter and a finer crumb.
- Don’t Overmix: Once you combine wet and dry ingredients, mix just until no streaks of dry flour remain. Overmixing develops the gluten, making your cake tough and dry.
- Hot Water/Coffee: Don’t skip the hot liquid! It “blooms” the cocoa powder, intensifying its flavor, and helps create an incredibly moist cake. Hot coffee specifically deepens the chocolate flavor without making the cake taste like coffee.
- Even Baking: Divide your batter evenly between pans. Use an ice cream scoop to ensure uniform amounts, which leads to even baking.
- Don’t Open the Oven Door: Resist the urge to peek during the first 2/3 of the baking time. Rapid temperature changes can cause your cake to sink.
- Cool Completely: Patience is a virtue here. Cakes must be completely cool before frosting. Even slightly warm cake will melt your frosting and create a crumbly mess.
Creative Twists
While the classic version is divine, here are a few ideas to shake things up and make this No-Fail Chocolate Cake your own:
- Mint Chocolate: Add 1/2 teaspoon of pure peppermint extract to the batter and frost with a mint-flavored buttercream or a ganache swirled with green food coloring.
- Spiced Chocolate: Incorporate 1/2 teaspoon of ground cinnamon or a pinch of cayenne pepper into the dry ingredients for a subtle warmth and complexity.
- Mocha Madness: Use stronger brewed coffee in the batter and add a tablespoon of instant espresso powder to both the cake and your frosting for an extra coffee kick.
- Boozy Twist: Replace half of the milk with a shot of Kahlua, Bailey’s, or even a good quality dark rum for an adult-friendly version.
- Sheet Cake Conversion: This recipe can easily be baked as a 9×13 inch sheet cake. Adjust baking time to 35-45 minutes, checking with a toothpick.
Common Questions
Can I make this cake gluten-free?
Yes, you can often substitute a 1:1 gluten-free baking flour blend for the all-purpose flour in this recipe. Ensure your blend contains xanthan gum (or add 1/2 tsp per cup of flour) for best results. Baking time might vary slightly.
Why do you use hot water or coffee?
Hot liquid serves two main purposes. Firstly, it “blooms” the cocoa powder, releasing more of its flavor and creating a deeper, richer chocolate taste. Secondly, it helps break down the flour, resulting in a more tender and moist crumb for the cake. Coffee specifically enhances chocolate’s flavor without making the cake taste like coffee itself.
My cake sunk in the middle, what happened?
Several factors can cause a cake to sink. Common culprits include: opening the oven door too early (causing a sudden temperature drop), incorrect oven temperature (check with an oven thermometer!), overmixing the batter (developing too much gluten), or using old leavening agents (baking soda/powder). Ensure your ingredients are fresh and follow the tips carefully.
Can I make cupcakes with this batter?
Absolutely! This batter makes fantastic cupcakes. Line a muffin tin with paper liners and fill each about two-thirds full. Bake for approximately 18-22 minutes, or until a toothpick inserted comes out clean. This recipe should yield about 24 standard cupcakes.
No-Fail Chocolate Cake
Equipment
- Oven
- 8-inch round cake pans
- Large bowl
- Whisk
- Medium bowl
- Electric mixer
- Wire rack
- Wooden skewer or toothpick
Ingredients
Dry Ingredients
- 2 cups all-purpose flour
- 2 cups granulated sugar
- ¾ cup unsweetened cocoa powder
- 2 teaspoons baking soda
- 1 teaspoon baking powder
- 1 teaspoon salt
Wet Ingredients
- 2 large eggs
- 1 cup milk whole milk recommended
- ½ cup vegetable oil
- 2 teaspoons vanilla extract
Additional
- 1 cup boiling water or hot coffee
Instructions
Preparation
- Preheat your oven to 350°F (175°C) and prepare two 8-inch round cake pans by greasing and flouring them or lining with parchment paper.
Mixing
- In a large bowl, whisk together all the dry ingredients until thoroughly combined and lump-free.
- In a separate medium bowl, whisk together the eggs, milk, vegetable oil, and vanilla extract.
- Pour the wet ingredients into the dry mixture and mix on low speed or by hand until just combined; avoid overmixing.
- Carefully stir in the boiling water until the batter is smooth and thin.
Baking & Cooling
- Pour the batter evenly into the prepared cake pans and bake for 30-35 minutes, or until a skewer inserted into the center comes out clean.
- Allow the cakes to cool in the pans on a wire rack for 10-15 minutes before inverting them onto the rack to cool completely.