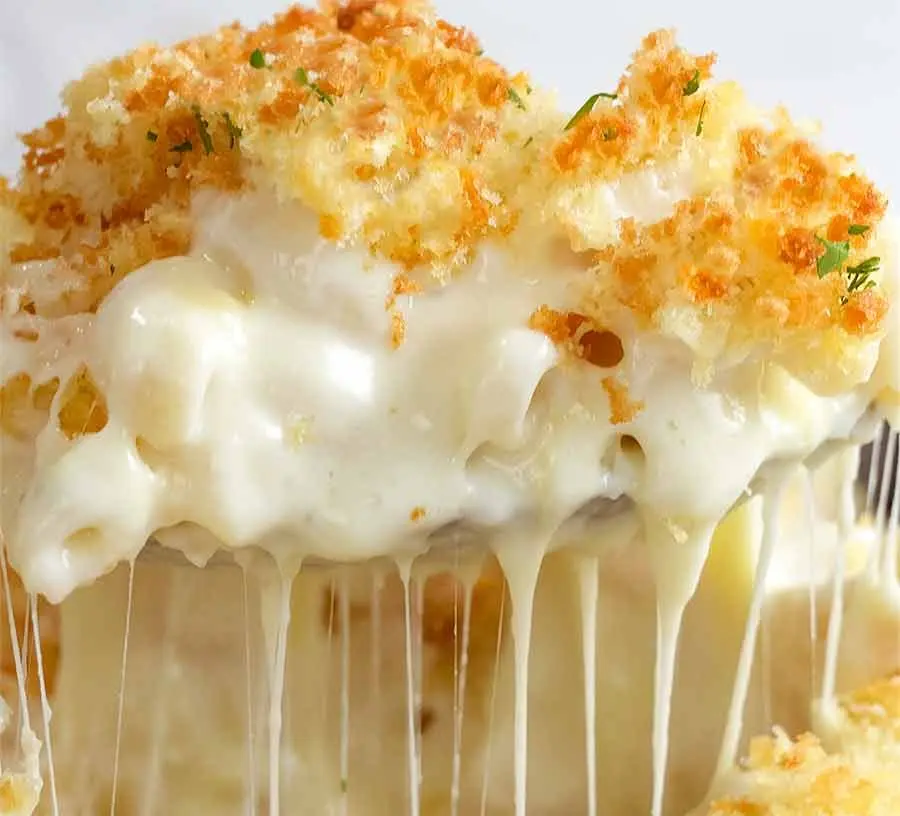
There’s something incredibly comforting about a bubbling hot dish of baked macaroni and cheese straight from the oven. For me, it evokes memories of family gatherings, holiday feasts, and even quiet nights in with a good movie. It’s a dish that feels like a warm hug, a culinary embrace that never disappoints. But let’s be honest, even the most beloved comfort food can sometimes fall into a rut. We’ve all had those moments where our homemade mac and cheese, while good, just misses that oomph, that extra something that makes it truly unforgettable. That’s exactly why I wanted to share these tested tips with you – to transform your beloved classic into a showstopper that will have everyone asking for your secret recipe.
Why you’ll love this dish
If you’re wondering why you should bother tweaking an already perfectly good baked mac and cheese recipe, let me tell you: the difference is night and day. These aren’t just minor adjustments; they’re game-changers that elevate humble pasta and cheese into a truly gourmet experience. You’ll love this dish because it takes a familiar favorite and injects it with layers of flavor, texture, and pure delight. It’s perfect for a cozy weeknight when you want something satisfying, impressive enough for a potluck or holiday meal, and versatile enough to please even picky eaters. Plus, experimenting with these tips is just plain fun!
> “I used to think my mac and cheese was decent, but after trying these tips, it’s become a legend in my house! The extra crunch from the topping and the depth of flavor from the cheese combo are incredible.” – Happy Home Cook
Preparing Baked Mac and Cheese: 7 Ways to Level Up Your Meal
The beauty of leveling up your baked mac and cheese isn’t in a radical overhaul, but in strategic enhancements. We’re talking about taking your basic framework—cooked pasta, a rich cheese sauce, and a bake in the oven—and infusing it with thoughtful ingredients and techniques. Before we dive into the specific ingredients, let’s walk through the general flow: you’ll cook your pasta al dente, prepare a béchamel base, melt in a carefully chosen blend of cheeses, often incorporate some additional flavor boosts, combine with the pasta, top it creatively, and then bake until golden and bubbly. Each of our “level-up” tips will slot into one of these stages to enhance the final product.
What you’ll need
To embark on your journey to next-level baked mac and cheese, here’s a general list of items you’ll gather. Remember, the specific fun additions come later with our “level-up” tips!
- For the Pasta:
- 1 pound elbow macaroni or other preferred pasta (shells, cavatappi work wonderfully for holding sauce)
- Salt for boiling water
- For the Béchamel Base:
- 1/2 cup (1 stick) unsalted butter
- 1/2 cup all-purpose flour
- 4 cups milk (whole milk is recommended for richness)
- 1 teaspoon dry mustard powder (secret weapon for cheese flavor!)
- 1/2 teaspoon onion powder
- Salt and freshly ground black pepper to taste
- For the Cheese:
- 4-5 cups freshly grated cheese blend (see our tips for specific recommendations!)
- For Assembly & Baking:
- A large baking dish (9×13 inch)
- Optional: Topping ingredients (see our tips!)
Directions to follow
Let’s break down the classic process, keeping in mind that our “level-up” tips will be integrated into these steps to create your ultimate baked mac and cheese experience.
- Cook the Pasta: Bring a large pot of heavily salted water to a rolling boil. Add your macaroni and cook according to package directions until it’s al dente – meaning it still has a slight bite. Remember, it will continue to cook in the oven. Drain well and set aside. Do not rinse the pasta; the starch helps the sauce cling.
- Make the Roux: In a large, heavy-bottomed pot or Dutch oven, melt the butter over medium heat. Once melted, sprinkle in the flour, whisking constantly for 1-2 minutes until a smooth paste forms (this is your roux). It should smell a bit nutty.
- Create the Béchamel: Gradually whisk in the milk, a little at a time, ensuring no lumps form. Continue whisking as the sauce heats and thickens, which usually takes about 5-8 minutes. It should be thick enough to coat the back of a spoon. Stir in the dry mustard powder, onion powder, salt, and pepper.
- Melt the Cheese: Remove the pot from the heat. Gradually add your grated cheese (reserving a bit if you plan a cheesy topping) to the béchamel, stirring until completely melted and smooth. Taste and adjust seasonings if necessary.
- Combine and Assemble: Add the cooked, drained pasta to the cheese sauce and stir gently until every piece is gloriously coated. Pour the pasta mixture into your prepared 9×13 inch baking dish.
- Add Your Level-Up Topping (if using): This is where some of our magic happens! Sprinkle your chosen topping evenly over the mac and cheese.
- Bake: Preheat your oven to 375°F (190°C). Bake for 25-35 minutes, or until the mac and cheese is bubbly around the edges and the topping is golden brown and crispy.
- Rest and Serve: Allow the baked mac and cheese to rest for 5-10 minutes before serving. This helps the sauce set up a bit and prevents it from being too runny.
Best ways to enjoy it
Baked Mac and Cheese, especially when leveled up, is fantastic on its own as a hearty meal. However, you can make it even more special with a few thoughtful pairings. For a balanced dinner, serve it alongside a crisp, fresh green salad with a vibrant vinaigrette to cut through the richness. Steamed or roasted vegetables like broccoli, asparagus, or green beans also make excellent companions. If you’re going for a comforting American classic vibe, it pairs beautifully with barbecue (pulled pork, brisket), grilled chicken, or even a simple piece of baked salmon. For a truly indulgent experience, a sprinkle of fresh chives or finely chopped parsley as a garnish not only adds a pop of color but also a fresh herbaceous note.
Keeping leftovers fresh
Proper storage is key for enjoying your incredible baked mac and cheese for days. Once cooled to room temperature, transfer any leftovers to an airtight container. It will keep well in the refrigerator for up to 3-4 days.
Reheating: To reheat, you can either warm individual portions in the microwave, adding a splash of milk to help rehydrate the sauce, or reheat a larger portion in the oven. For oven reheating, place it in an oven-safe dish, add a tablespoon or two of milk over the top, cover with foil to prevent drying, and bake at 300°F (150°C) until heated through, about 20-30 minutes. Uncover for the last few minutes if you want to crisp up the topping again.
Freezing: Baked mac and cheese freezes exceptionally well, making it a great make-ahead meal! Assemble the mac and cheese in a freezer-safe baking dish (you can even use disposable aluminum pans). If you’re adding a breadcrumb topping, it’s sometimes best to add this fresh before baking from frozen for optimal crispiness. Cover tightly with plastic wrap and then aluminum foil. It can be frozen for up to 2-3 months. To cook from frozen, remove the plastic wrap, cover tightly with foil, and bake at 350°F (175°C) for about 60-90 minutes, or until bubbling and hot in the center. Remove the foil for the last 15-20 minutes to brown the topping.
Helpful cooking tips
To truly nail your leveled-up baked mac and cheese, keep these pro tips in mind:
- Freshly Grate Your Cheese: This is non-negotiable! Pre-shredded cheeses are often coated with anti-caking agents (like cellulose) that can make your sauce gritty and prevent it from melting smoothly. Grating your own ensures a silky, luscious cheese sauce.
- Cook Pasta Al Dente: Undercook your pasta slightly. It will continue to cook and absorb sauce in the oven, preventing it from turning mushy.
- Don’t Skimp on Fat: Use whole milk and real butter. The fat content contributes significantly to the creamy texture and richness of the sauce.
- Layer Your Flavors: Don’t just rely on cheese. A pinch of dry mustard (it doesn’t make it taste like mustard, it enhances the cheese flavor!), a dash of onion or garlic powder, and a good amount of salt and pepper are crucial.
- Taste as You Go: Always taste your béchamel before adding cheese, and then taste the cheese sauce before adding the pasta. Adjust salt and pepper as needed. Cheese can be salty, so be mindful.
- Resting is Key: Allow the baked mac and cheese to rest for 5-10 minutes after baking. This lets the sauce thicken slightly and prevents it from being watery when you scoop it out.
Creative twists
Here are 7 amazing ways to level up your baked mac and cheese, going beyond the basic to create a masterpiece:
- Embrace a Bold Cheese Blend: Forget just cheddar! Combine sharp cheddar (for tang), Gruyère (for nuttiness and melt), and a touch of Fontina or provolone (for stretchiness and mild creaminess). Add a tiny bit of Parmesan for a salty kick.
- Infuse Your Milk: Before making your béchamel, gently warm your milk with aromatics like a bay leaf, a few peppercorns, half an onion, or a clove of garlic. Let it steep for 15-20 minutes, then strain before using. This adds subtle depth.
- Add a “Secret Ingredient” Flavor Booster: Stir in a tablespoon of Dijon mustard, a splash of Worcestershire sauce, or even a teaspoon of smoked paprika into your cheese sauce. These little additions amplify the overall savoriness without overpowering the cheesiness.
- Introduce Savory Mix-Ins: Swirl in cooked, crumbled bacon, sautéed mushrooms, caramelized onions, roasted garlic, or even cooked shredded chicken or ham into the pasta and cheese mixture before baking. This adds extra texture and heartiness.
- Craft a Mighty Crumb Topping: Elevate beyond plain breadcrumbs. Combine panko breadcrumbs (for extra crispness) with melted butter, grated Parmesan cheese, a pinch of garlic powder, and some fresh herbs like parsley or thyme. You can even add some crushed potato chips or buttery crackers for a unique crunch.
- Spice It Up: If you love a kick, add a pinch of cayenne pepper, a dash of hot sauce to the cheese sauce, or finely diced jalapeños (either fresh or roasted) to the mix.
- Utilize Butter & Broth: Instead of just milk, replace a quarter of your milk with good quality chicken or vegetable broth for another layer of savory flavor. Also, after draining your pasta, toss it with a tablespoon of butter to prevent sticking and add a rich base before it meets the sauce.
FAQ
Can I make baked mac and cheese ahead of time?
Yes, absolutely! You can assemble the entire dish up to the point of baking, cover it tightly with plastic wrap, and refrigerate for up to 24 hours. When ready to bake, let it sit at room temperature for 30 minutes while your oven preheats, then bake as directed, potentially adding an extra 5-10 minutes to the baking time since it’s starting cold. For best results with a crispy topping, add the topping just before baking.
What kind of pasta is best for baked mac and cheese?
While elbow macaroni is traditional, any pasta shape with nooks and crannies or a good surface area for sauce to cling to works wonderfully. Options like cavatappi, shells (medium or large), rotini, or even penne are excellent choices because they trap more of that delicious cheese sauce.
Why is my baked mac and cheese sauce sometimes gritty or oily?
A gritty sauce is often due to using pre-shredded cheeses (which contain anti-caking agents) or overheating the cheese, causing the proteins to seize up. An oily sauce can happen if you overheat the cheese or use too much high-fat cheese, causing the fats to separate. To avoid this, always fresh-grate your cheese, remove the béchamel from the heat before adding cheese, and stir gradually until just melted. Also, ensure your béchamel is thick enough to emulsify the cheese properly.

Creamy Chicken & Broccoli Baked Mac and Cheese
Equipment
- Oven
- Large saucepan or Dutch oven
- 9×13-inch baking dish
Ingredients
Main Ingredients
- 1 pound elbow macaroni or other small pasta shape
- 2 tablespoons olive oil
- 1 small onion finely diced
- 2 cloves garlic minced
- 1 can condensed cheddar cheese soup 10.75-ounce
- 1/2 cup milk
- 1/2 teaspoon smoked paprika
- 1/4 teaspoon black pepper
- 2 cups rotisserie chicken cooked, shredded
- 1.5 cups broccoli florets steamed
- 2 cups sharp cheddar cheese shredded, divided
- 1 cup gruyere cheese shredded
- 1/4 cup Parmesan cheese grated
- 1/2 cup panko breadcrumbs optional, for topping
Instructions
Preparation
- Preheat your oven to 375°F (190°C) and cook macaroni according to package instructions until al dente; drain and set aside.
- In a large saucepan or Dutch oven, heat olive oil over medium heat, then sauté diced onion until softened (3-5 minutes), and add minced garlic for another minute until fragrant.
Cheese Sauce & Assembly
- Stir in condensed cheddar cheese soup, milk, smoked paprika, and black pepper, and heat gently until warmed and combined.
- Remove from heat, then add 1.5 cups of sharp cheddar cheese and all the gruyere cheese, stirring until melted and smooth.
- Stir the cooked shredded chicken and steamed broccoli florets into the cheese sauce.
- Add the cooked macaroni to the sauce and stir to coat, then pour the mixture into a 9×13-inch baking dish.
Baking
- Sprinkle the remaining 1/2 cup sharp cheddar cheese, grated Parmesan cheese, and optional panko breadcrumbs over the top.
- Bake for 20-25 minutes, or until bubbly and the cheese is melted and slightly golden, then let stand for a few minutes before serving.