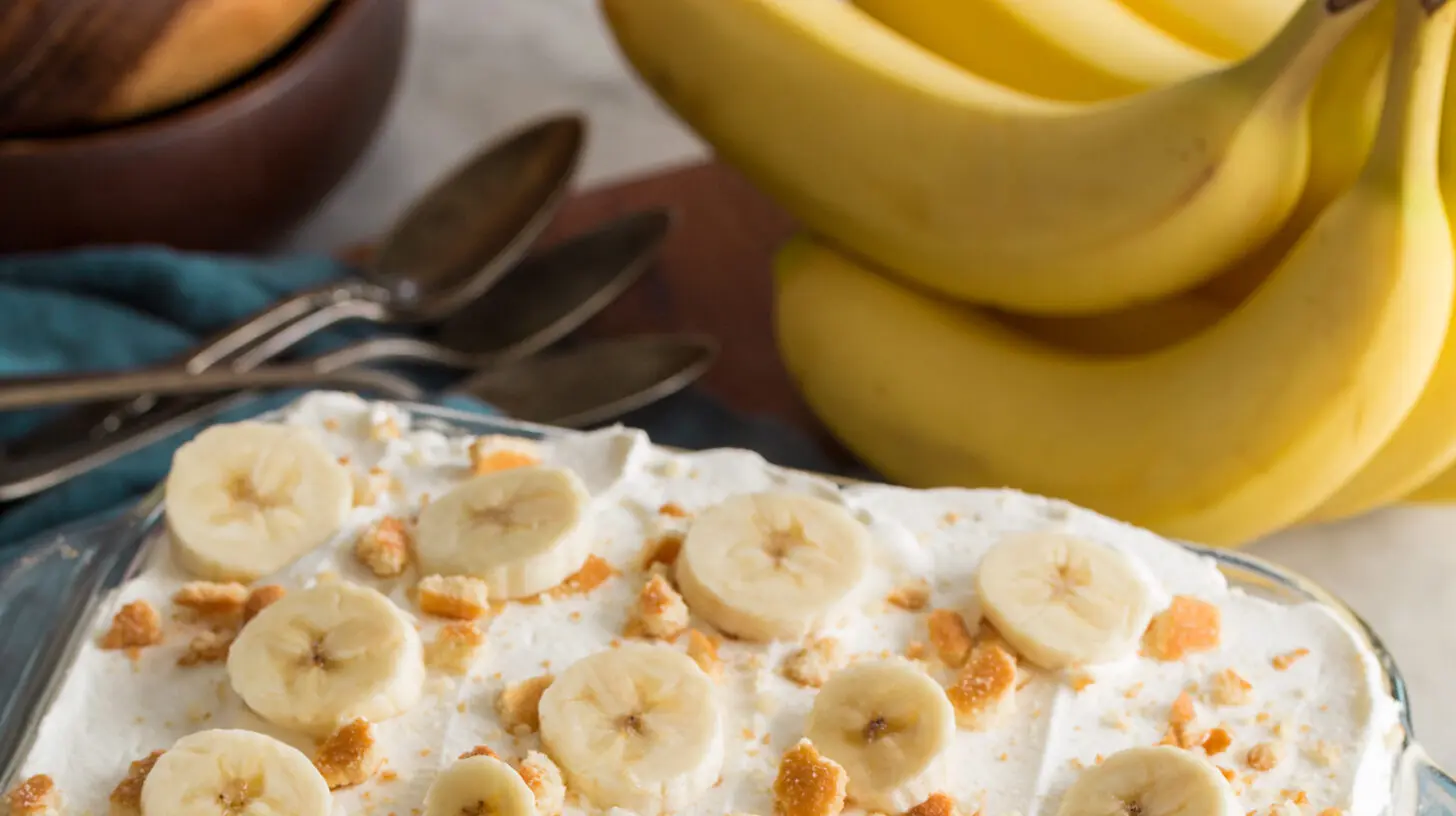
There’s something about banana pudding that just screams comfort, doesn’t it? For me, it conjures up memories of scorching summer days spent at my grandma’s house, where a big bowl of this creamy, sweet dessert was always a staple after Sunday dinner. It wasn’t just a treat; it was a ritual. And while some recipes can feel intimidating, particularly when you’re new to the kitchen, this one is designed to be as fuss-free and enjoyable as those cherished memories. We’re talking about creating that same delicious, smile-inducing banana pudding in just two shockingly simple steps. Forget complicated techniques and long ingredient lists; this recipe is all about bringing that classic taste back into your life without the stress.
Why you’ll love this dish
If you’re someone who loves the idea of homemade desserts but cringes at the thought of a multi-page recipe, this banana pudding is your new best friend. It’s perfect for those weeknights when you crave something sweet but are short on time, or when you want to impress guests without breaking a sweat. The beauty of this recipe lies in its utter simplicity, making it incredibly beginner-friendly. Plus, it’s a total crowd-pleaser – who can resist layers of sweet bananas, creamy pudding, and tender vanilla wafers? It’s also incredibly budget-friendly, relying on common pantry staples that won’t require a special trip to a gourmet store.
> “I used to think banana pudding was super complicated, but this recipe changed my mind! So easy and absolutely delicious. My family devoured it!” – A Happy Home Cook
The cooking process explained
Before we dive into the specifics, let’s get a bird’s-eye view of how this delightful banana pudding comes together. You’re essentially building layers of flavor and texture. First, you’ll prepare your creamy pudding base, which requires minimal cooking (or even no cooking, depending on your choice of pudding!). Then, it’s all about arranging those layers with fresh banana slices and vanilla wafers, letting them mingle and soften to perfection in the fridge. That’s it! No fancy equipment, no elaborate techniques – just pure, simple goodness.
What you’ll need
To whip up this easy banana pudding, you won’t need to gather an extensive list of ingredients. Here’s what you’ll be reaching for:
- Instant Vanilla Pudding Mix: One large (5.1 oz) box. This is our secret weapon for speed and creaminess. You could use cook-and-serve if you prefer, but instant truly lives up to its name here!
- Milk: 3 cups, cold. Whole milk works best for a richer, creamier pudding, but 2% will also do the trick.
- Sweetened Condensed Milk: 1 (14 oz) can. This adds an incredible depth of sweetness and a velvety texture. Don’t skip it!
- Vanilla Extract: 1 teaspoon. A good quality vanilla always elevates a dessert.
- Cool Whip: 1 (8 oz) container, thawed. This adds a light, airy touch and makes the pudding effortlessly fluffy. If you prefer, you can make your own whipped cream.
- Bananas: 4-5 ripe but firm bananas, sliced. Look for bananas that are yellow with just a few small brown speckles – they’ll be sweet but not mushy.
- Vanilla Wafers: 1 (11 oz) box. These classic cookies are essential for that signature banana pudding texture.
Directions to follow
As promised, this recipe comes together in just two main steps. Get ready for some seriously easy dessert making!
- Prepare the Pudding Base: In a large mixing bowl, combine the instant vanilla pudding mix and the cold milk. Whisk thoroughly for about 2 minutes until the mixture begins to thicken. Then, pour in the can of sweetened condensed milk and the vanilla extract. Gently fold in the thawed Cool Whip until everything is well combined and you have a light, airy, and creamy pudding mixture.
- Assemble and Chill: Now, it’s time to build your masterpiece! In a large serving dish (a 9×13 inch baking dish works perfectly), spread a thin layer of the pudding mixture on the bottom. Arrange a single layer of vanilla wafers over the pudding, followed by a layer of sliced bananas. Repeat these layers – pudding, wafers, bananas – until you’ve used all your ingredients, ending with a final layer of pudding. For an extra touch, you can arrange a few more vanilla wafers or banana slices on top. Cover the dish tightly with plastic wrap and refrigerate for at least 4 hours, or preferably overnight, to allow the wafers to soften and the flavors to meld.
Best ways to enjoy it
Banana pudding is fantastic served simply, chilled right out of the fridge. For a little extra flair, you could garnish individual servings with a dollop of fresh whipped cream, a sprinkle of cinnamon, or even a few delicate vanilla wafer crumbles. It’s truly a standalone dessert, but if you’re feeling adventurous, it pairs wonderfully after a classic Southern meal like fried chicken, collard greens, and cornbread. It’s also light enough to be a refreshing end to a summer BBQ.
The best way to save extras
If by some miracle you have any leftovers (it’s rare!), banana pudding stores quite well. Simply cover the serving dish tightly with plastic wrap or transfer individual portions to airtight containers and refrigerate. It’s best enjoyed within 2-3 days. Beyond that, the bananas can start to become a bit too soft and discolored. Freezing isn’t generally recommended for banana pudding, as the texture of the bananas and the pudding can change significantly upon thawing, becoming watery or mushy.
Helpful cooking tips
- Choose the right bananas: This is key! You want ripe bananas for sweetness, but not overly ripe ones (the kind you’d use for banana bread) as they’ll turn to mush too quickly in the pudding. Look for bright yellow bananas with perhaps a few tiny brown specks.
- Chill time is crucial: Don’t rush the chilling process. Those 4 hours (or overnight) are essential for the vanilla wafers to soften and absorb some of the pudding’s flavor, creating that signature tender texture.
- Whisk well, but don’t overmix: When preparing the pudding, whisk until it just thickens. Over-whisking can sometimes make instant pudding slightly grainy. When folding in the Cool Whip, be gentle to maintain its airy texture.
- Prevent banana browning (optional): If you’re concerned about your banana slices browning, you can lightly toss them in a small amount of lemon juice before layering. However, in this recipe, with the quick chilling and layering, it’s often not necessary as they’re well-protected by the pudding.
Creative twists
This simple banana pudding is a fantastic base for experimentation!
- Chocolatey Twist: Add a layer of chocolate syrup or a sprinkle of mini chocolate chips between the banana and wafer layers.
- Caramel Delight: Drizzle some caramel sauce over the banana layers for an extra decadent touch.
- Spiced Up: A tiny pinch of nutmeg or cinnamon mixed into the pudding base can add a warm, cozy note.
- Switch the Wafers: While vanilla wafers are classic, try Nilla Wafers, graham crackers, or even shortbread cookies for a different texture.
- Hazelnut Heaven: Add a spoonful of hazelnut spread (like Nutella) to your pudding mixture or swirl it between layers.
Common questions
Can I use fresh whipped cream instead of Cool Whip?
A: Absolutely! If you prefer, you can certainly use freshly whipped cream. Just ensure it’s sweetened slightly (about 2 tablespoons of powdered sugar per 1 cup of heavy cream) and fold it gently into the pudding mix for a luxurious, homemade touch.
Why did my pudding not thicken?
A: The most common culprits are usually not whisking enough initially, or using milk that isn’t cold enough. Make sure your milk is straight from the fridge and whisk vigorously for a full two minutes when combining the instant pudding mix. Also, ensure you’re using instant pudding, not cook-and-serve, which requires heating.
Can I make this pudding in individual cups?
A: Yes, this is a fantastic way to serve banana pudding for parties! Simply layer the ingredients in small dessert cups, mason jars, or ramekins. This works especially well if you’re traveling or want pre-portioned servings. The chilling time will remain the same.
Creamy Dreamy Homemade Banana Pudding
Equipment
- large saucepan
- small bowl
- whisk
- fine-mesh sieve (optional)
- plastic wrap
- large trifle bowl or 9×13 inch baking dish
Ingredients
Custard
- 4-5 medium-sized, ripe but firm bananas
- 1 box (11-12 ounces) vanilla wafers
- 4 cups whole milk
- 1 cup granulated sugar
- 1/2 cup cornstarch
- 4 large eggs, yolks separated from whites
- 1/4 teaspoon salt
- 4 tablespoons (1/2 stick) unsalted butter
- 2 teaspoons vanilla extract
Optional Whipped Topping
- 1.5 cups heavy cream
- 2 tablespoons powdered sugar
Instructions
Preparation
- Whisk together sugar, cornstarch, and salt in a large saucepan, then gradually whisk in the whole milk until smooth.
- Whisk egg yolks in a separate bowl, then slowly pour about 1 cup of the warm milk mixture into the egg yolks, whisking constantly.
- Pour the egg yolk mixture back into the saucepan and cook over medium heat, whisking constantly, until thickened and gently boiling (8-10 minutes).
- Remove from heat and stir in butter and vanilla extract until melted and incorporated; strain through a fine-mesh sieve for an extra smooth custard.
- Cover the custard directly with plastic wrap and let it cool on the counter for 30 minutes, then refrigerate for 1-2 hours until thoroughly chilled.
- Just before assembling, slice bananas into 1/4-inch thick rounds.
Assembly and Chilling
- Spread a thin layer of chilled custard in a trifle bowl or baking dish, then layer with vanilla wafers, sliced bananas, and one-third of the remaining custard.
- Repeat the layers until all ingredients are used, ending with a generous layer of custard on top.
- For the optional topping, whip heavy cream and powdered sugar in a cold bowl until stiff peaks form.
- Cover the pudding tightly and refrigerate for 4-6 hours or overnight; garnish with whipped cream and wafers or banana slices before serving.