I remember the first time I attempted a blooming onion at home. It was… ambitious, to say the least. The full-sized version can be a bit of a theatrical production, delicious as it is. That’s why these Bite-Sized Blooming Onions with Buttermilk Ranch Dip are such a game-changer. All the crispy, seasoned goodness you crave, but in an easy, dippable format that’s perfect for sharing, snacking, or just enjoying without a knife and fork drama. Seriously, once you try these, you’ll wonder why you ever bothered with the big ones.
Why You’ll Love This Dish
There’s something irresistibly fun about finger foods, and these bite-sized blooming onions hit all the right notes. They’re not just a smaller version of a classic; they’re an improvement. You get that wonderful crunch from the seasoned breading, the sweet and savory flavor of the onion, and then that cool, creamy, tangy buttermilk ranch dip to balance it all out. They’re quick enough for a weeknight appetizer but impressive enough for any party or gathering. Plus, who doesn’t love a good onion ring, but elevated? They transform a humble onion into something truly special – and deeply craveable.
> “I made these for our game night, and they disappeared almost instantly! Everyone raved about the crunchy coating and the homemade ranch dip. Definitely making these again!” – A Happy Home Cook
The Cooking Process Explained
Making these bite-sized wonders isn’t nearly as intimidating as you might think. The core idea is to break down the onion into smaller, manageable pieces that are easier to coat and fry. You’ll start by prepping your onions, separating them into individual “petals” or rings. Then comes the classic dredging station: a quick dip in a seasoned wet batter, followed by a generous coating in a dry, spiced flour mixture. This double-layer ensures that incredibly crispy exterior. Finally, they take a quick dip in hot oil until golden brown and delicious. While they’re frying, whip up that homemade buttermilk ranch dip – it’s super simple and makes all the difference.
What You’ll Need
To whip up these irresistible bite-sized blooming onions and their accompanying dip, gather these items:
For the Bite-Sized Blooming Onions:
- 1 large or 2 medium yellow onions
- 1 cup all-purpose flour, divided
- 1/2 cup cornstarch
- 1 teaspoon paprika
- 1 teaspoon garlic powder
- 1/2 teaspoon onion powder
- 1/2 teaspoon cayenne pepper (optional, for a kick)
- 1/4 teaspoon black pepper
- Salt, to taste
- 1 cup buttermilk (or milk with 1 tbsp vinegar/lemon juice, let sit 5 mins)
- 1 large egg
- Vegetable oil, for frying
For the Buttermilk Ranch Dip:
- 1/2 cup mayonnaise
- 1/2 cup sour cream or plain Greek yogurt
- 1/4 cup buttermilk
- 1 tablespoon fresh chives, finely chopped
- 1 tablespoon fresh parsley, finely chopped
- 1 teaspoon dried dill
- 1/2 teaspoon garlic powder
- 1/2 teaspoon onion powder
- 1/4 teaspoon salt
- Pinch of black pepper
- A squeeze of fresh lemon juice (optional, for brightness)
Directions to Follow
Let’s get these crispy beauties cooked up!
- Prep the Onions: Peel the onions and cut them into 1/2-inch thick slices. Carefully separate the rings into individual “petals” or pieces. Aim for uniform sizes for even cooking.
- Set Up Dredging Stations: In a shallow bowl, whisk together 1/2 cup of the flour, cornstarch, paprika, garlic powder, onion powder, cayenne (if using), black pepper, and 1/2 teaspoon of salt. This will be your dry mixture. In another shallow bowl, whisk together the remaining 1/2 cup flour, buttermilk, egg, and a pinch of salt. This is your wet batter.
- Heat the Oil: Pour about 2-3 inches of vegetable oil into a heavy-bottomed pot or Dutch oven. Heat over medium-high heat to 350°F (175°C). Use a candy thermometer or deep-fry thermometer to monitor the temperature.
- Coat the Onions: Working in batches, dip the onion pieces first into the wet batter, letting any excess drip off. Then, transfer them to the dry flour mixture, turning to coat completely. Press lightly to ensure the flour adheres well. Place coated onions on a wire rack while you prepare the others.
- Fry the Onions: Carefully lower a batch of coated onion pieces into the hot oil. Don’t overcrowd the pot, as this will lower the oil temperature and prevent them from getting crispy. Fry for 2-4 minutes, turning occasionally, until golden brown and crispy.
- Drain and Season: Remove the fried onions with a slotted spoon and transfer them to a paper towel-lined plate to drain excess oil. Immediately sprinkle them lightly with a little extra salt.
- Make the Dip: While the onions are frying, combine all the Buttermilk Ranch Dip ingredients in a small bowl. Whisk until smooth. Taste and adjust seasoning as needed.
- Serve: Serve the hot, crispy bite-sized blooming onions immediately with the homemade buttermilk ranch dip.
How to Serve It
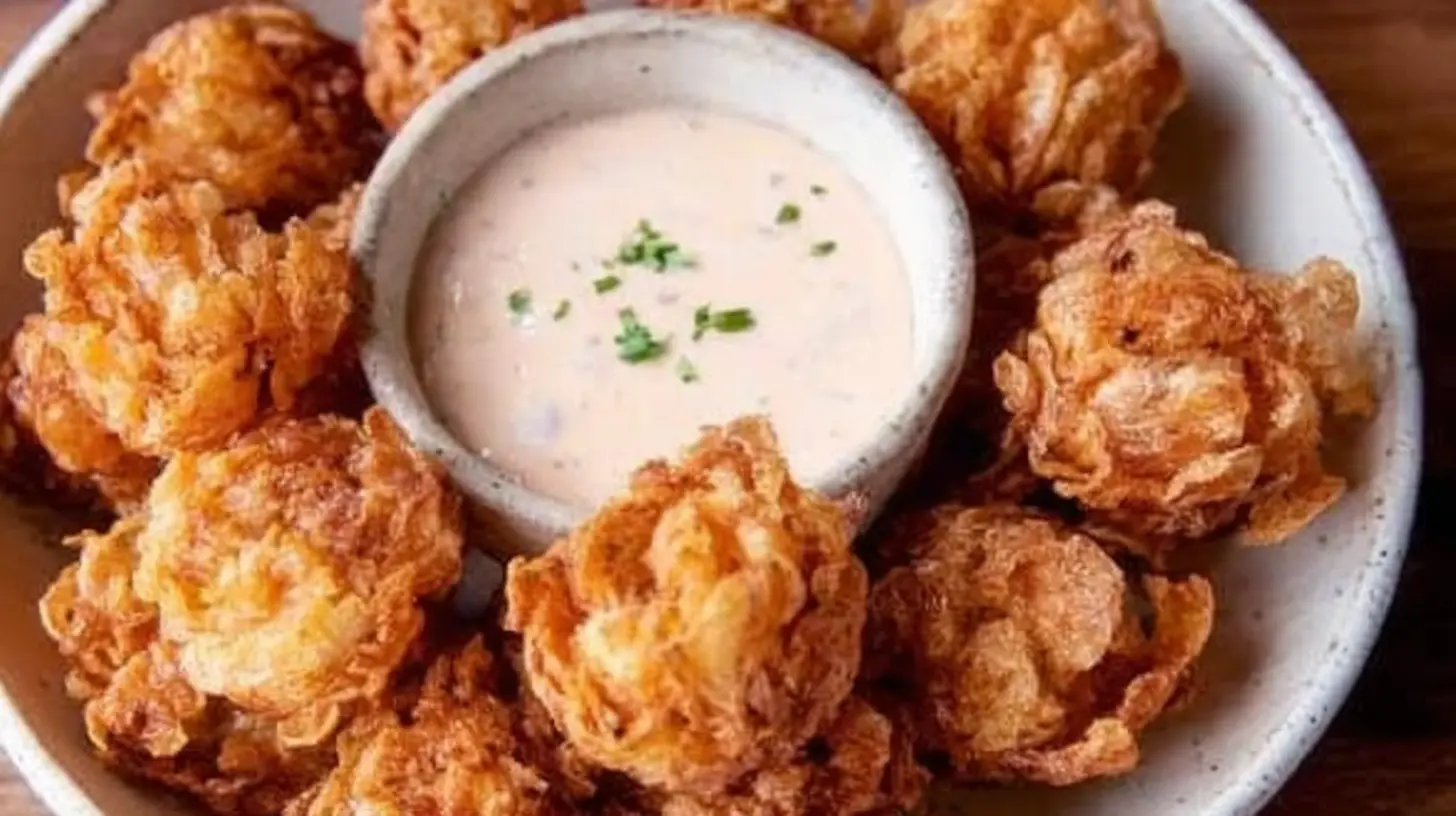
These bite-sized blooming onions are best enjoyed fresh out of the fryer, while they’re still hot and wonderfully crispy. Arrange them artfully on a platter around a small bowl of that creamy buttermilk ranch dip, or give each person their own little ramekin of dip for ultimate dunking convenience. They make a fantastic appetizer for game days, potlucks, or just a fun weekend snack. You could even serve them as a unique side dish alongside grilled chicken or burgers. For an extra touch, a sprinkle of fresh chopped parsley or chives over the top of the onions just before serving adds a pop of color and freshness.
Keeping Leftovers Fresh
Let’s be honest, it’s rare to have leftovers of these! But if you do, storing them properly will help. Once completely cooled, place any leftover bite-sized blooming onions in an airtight container in the refrigerator for up to 2-3 days.
Reheating: The best way to regain some crispness is in an air fryer or oven. Reheat in an air fryer at 350°F (175°C) for 3-5 minutes, or on a baking sheet in a conventional oven at 375°F (190°C) for 5-8 minutes, until heated through and re-crisped. Microwaving is not recommended as it will make them soggy.
The Buttermilk Ranch Dip can be stored in an airtight container in the refrigerator for up to 5-7 days. Give it a good stir before serving again.
Pro Chef Tips
- Mind the Oil Temperature: This is crucial for crispiness. If the oil isn’t hot enough, the onions will absorb too much oil and be greasy. If it’s too hot, they’ll burn before cooking through. A thermometer is your best friend here.
- Don’t Overcrowd: Frying in small batches is essential. Overcrowding lowers the oil temperature rapidly and leads to soggy, pale onions. Patience pays off!
- Season Generously: Don’t be shy with the seasonings in your flour mixture – that’s where a lot of the flavor comes from. A final pinch of salt right after frying also makes a huge difference.
- Use Buttermilk: The acidity in buttermilk helps tenderize the onion slightly and creates a more tender crisp coating. If you don’t have it, a quick DIY version works well (milk + acid).
- Homemade Dip is Key: While store-bought ranch is fine, making your own with fresh herbs really elevates this dish. You control the flavor, and it tastes so much brighter.
Creative Twists
- Spicy Kick: Amp up the cayenne in the breading, or add a pinch of chili powder to the dip for a fiery version. You could even drizzle a little hot sauce over the fried onions.
- Cheesy Onions: Add a few tablespoons of finely grated Parmesan cheese to your dry dredge mixture for a savory, cheesy crust.
- Herbaceous Onions: Mix dried Italian herbs or a blend like Herbes de Provence into the dry flour coating for a different aromatic profile.
- Dipping Sauce Variety: Beyond ranch, these would be fantastic with a sriracha mayo, a sweet and tangy BBQ sauce, or even a classic honey mustard.
- Gluten-Free Option: Use a gluten-free all-purpose flour blend (one that contains xanthan gum) and ensure your cornstarch is certified GF.
Your Questions Answered
FAQ
Q: Can I use different types of onions?
A: Yellow onions are generally preferred for their balanced flavor that sweetens nicely when cooked. White onions can be a bit sharper, and red onions, while pretty, might become a little mushy. Stick with yellow or Spanish onions for the best results.
Q: Can I bake these instead of frying?
A: While you can bake them, you won’t achieve the same level of crispiness or texture as deep-frying. If baking, spray generously with cooking spray and bake at 400°F (200°C) for 15-20 minutes, flipping halfway, until golden and crisp.
Q: How far in advance can I prepare the onions?
A: You can cut and separate the onion rings a few hours ahead of time and store them in an airtight container in the fridge. You can also prepare the dry and wet dredging mixtures and the ranch dip in advance. However, the actual dredging and frying should be done right before serving for the best texture.
Crispy Mini Blooming Onions with Zesty Buttermilk Ranch Dip
Equipment
- Small bowl
- Whisk
- Cutting board
- Paring knife
- Shallow bowls
- Wire rack
- Heavy-bottomed pot or Dutch oven
- Cooking thermometer
- Slotted spoon or spider
- Paper towel-lined baking sheet
Ingredients
For the Bite-Sized Blooming Onions
- 10-12 Small Onions pearl onions or small shallots
- 1 cup All-purpose flour
- 1/4 cup Cornstarch
- 1 tablespoon Paprika
- 1 teaspoon Garlic powder
- 1 teaspoon Onion powder
- 1/2 teaspoon Cayenne pepper adjust to your spice preference
- Salt To taste
- Black Pepper To taste
- 2 Eggs large
- 1/4 cup Milk
- Vegetable oil or peanut oil For deep frying (enough to submerge the onions)
For the Buttermilk Ranch Dip
- 1/2 cup Mayonnaise Full-fat for the best creaminess
- 1/4 cup Buttermilk
- 1 tablespoon Fresh Chives finely chopped
- 1 tablespoon Fresh Parsley finely chopped
- 1/2 teaspoon Dill fresh or dried, fresh is always better if you have it!
- 1/2 teaspoon Garlic powder
- 1/2 teaspoon Onion powder
- Salt To taste
- Black Pepper To taste
- 1 teaspoon A squeeze of lemon juice optional
Instructions
The Buttermilk Ranch Dip
- In a small bowl, whisk together all dip ingredients until smooth and well combined.
- Taste and adjust seasonings as needed, then cover and refrigerate for at least 30 minutes to allow flavors to meld.
The Bite-Sized Blooming Onions
- Peel the small onions. Place each onion root-side up on a cutting board and make 4-6 evenly spaced cuts, stopping about 1/2 inch from the root end; gently spread the “petals” apart.
- In one shallow bowl, whisk flour, cornstarch, paprika, garlic powder, onion powder, cayenne pepper, salt, and black pepper. In another bowl, whisk eggs and milk.
- Dredge each onion first in the flour mixture, then in the egg wash, and finally back into the seasoned flour, ensuring full coverage. Place coated onions on a wire rack.
- Pour enough vegetable or peanut oil into a heavy-bottomed pot to a depth of 2-3 inches and heat to 350°F (175°C), using a cooking thermometer to monitor.
- Carefully lower 2-3 coated onions into the hot oil and fry for 3-5 minutes until deeply golden brown and crispy, turning occasionally for even cooking.
- Remove fried onions with a slotted spoon and place on a wire rack over a paper towel-lined baking sheet to drain; immediately sprinkle with extra salt.
- Repeat frying with remaining onions, ensuring the oil returns to 350°F (175°C) between batches.