Growing up, sugar cookies were always a holiday staple, but let’s be honest, sometimes they felt a little… plain. Then I discovered the magic of buttercream. Suddenly, those classic cut-outs transformed into canvases for creativity. If you’ve ever yearned for that perfect bite—a tender, buttery cookie topped with a swirl of velvety, sweet buttercream—then you know exactly why these aren’t just any cookies. They’re an experience.
Why You’ll Love This Dish
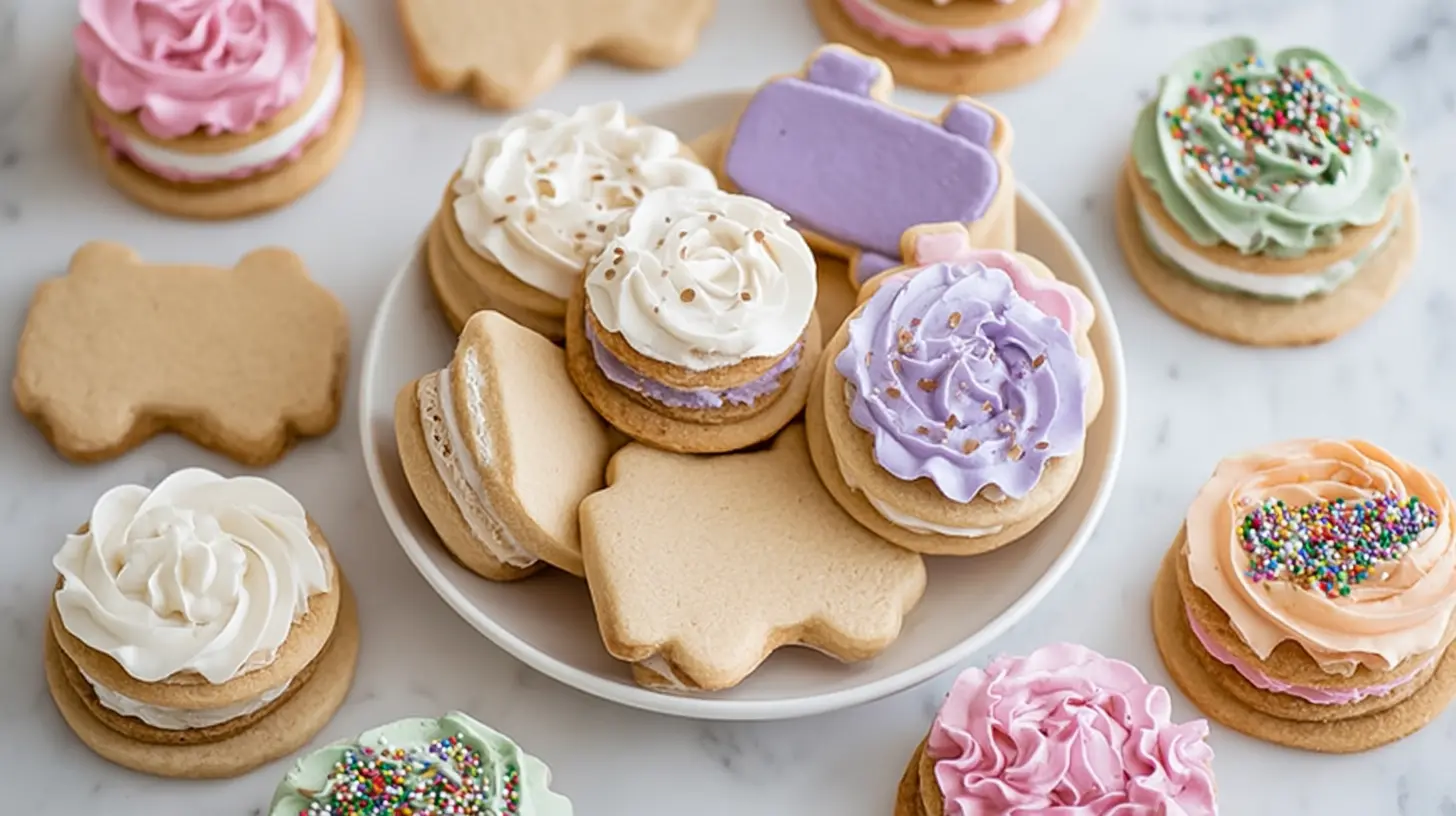
There’s something truly special about a homemade sugar cookie, and when you pair it with the creamy indulgence of buttercream, you elevate it to an entirely new level. These aren’t just for holidays; they’re perfect for birthdays, baby showers, or simply making a Tuesday feel a little more festive. What makes them stand out? The delicate balance of a perfectly baked, slightly crisp-edged sugar cookie with a soft, melt-in-your-mouth interior, all crowned with rich, pipeable buttercream. It’s also incredibly versatile – a blank slate for all your decorating dreams! Plus, who can resist a cookie that looks as good as it tastes?
What people are saying:
> “I used to think royal icing was the only way for decorated cookies, but these buttercream sugar cookies changed my mind! So much easier to work with and the flavor is beyond compare. My kids loved helping with the decorating!” – Sarah J.Step-by-Step Overview
Making these delightful Buttercream Sugar Cookies involves a few key stages. First, you’ll prepare a classic, sturdy sugar cookie dough that holds its shape beautifully. This dough needs a bit of chilling time, so plan accordingly. Next, you’ll roll it out and cut your desired shapes before baking them to golden perfection. While they cool, you whip up a luscious buttercream frosting – the real star here! Finally, the fun begins as you dive into the exciting world of decorating with your freshly made buttercream.
What You’ll Need
To embark on your Buttercream Sugar Cookie adventure, gather these essential items:
For the Sugar Cookies:
- 2 ½ cups All-purpose flour: The foundation of our tender cookies.
- 1 teaspoon Baking powder: Helps with a slight lift without spreading too much.
- ½ teaspoon Salt: Balances the sweetness.
- 1 cup (2 sticks) Unsalted butter, softened: Crucial for that rich, buttery flavor and tender texture.
- 1 ½ cups Granulated sugar: Sweetness and contributes to a crisp edge.
- 1 large Egg: Binds the dough together.
- 1 teaspoon Vanilla extract: Essential for classic sugar cookie taste.
For the Buttercream Frosting:
- 1 cup (2 sticks) Unsalted butter, softened: The base for a creamy, rich frosting.
- 4 cups Powdered sugar (confectioners’ sugar), sifted: Provides sweetness and structure. Sifting prevents lumps!
- ¼ cup Milk (or heavy cream): Adjusts consistency; heavy cream makes it richer.
- 1 teaspoon Vanilla extract (or almond extract for a different flavor): Enhances the taste.
- Pinch of salt: To balance the sweetness.
- Gel food coloring (optional): For vibrant, beautiful colors without thinning your frosting.
Directions to Follow
Let’s get baking! Follow these steps for perfect Buttercream Sugar Cookies:
For the Sugar Cookies:
- Whisk Dry Ingredients: In a medium bowl, whisk together the flour, baking powder, and salt. Set aside.
- Cream Butter and Sugar: In a large bowl, using an electric mixer, cream together the softened butter and granulated sugar on medium speed until light and fluffy, about 2-3 minutes.
- Add Wet Ingredients: Beat in the egg and vanilla extract until well combined, scraping down the sides of the bowl as needed.
- Combine: Gradually add the dry ingredients to the wet ingredients, mixing on low speed until just combined. Do not overmix. The dough will be thick.
- Chill Dough: Divide the dough in half, flatten each half into a disc, wrap tightly in plastic wrap, and chill in the refrigerator for at least 1 hour (or up to 2 days). This is crucial for preventing spread.
- Preheat & Prep: Preheat your oven to 375°F (190°C). Line baking sheets with parchment paper.
- Roll and Cut: On a lightly floured surface, roll out one disc of dough to about ¼-inch thickness. Use your favorite cookie cutters to cut out shapes.
- Bake: Carefully transfer the cut-out cookies to the prepared baking sheets. Bake for 8-10 minutes, or until the edges are lightly golden.
- Cool: Let the cookies cool on the baking sheets for a few minutes before transferring them to a wire rack to cool completely. They must be completely cool before frosting!
For the Buttercream Frosting:
- Cream Butter: In a large bowl, with an electric mixer, beat the softened butter on medium speed until light and creamy, about 2 minutes.
- Add Powdered Sugar: Gradually add the sifted powdered sugar, one cup at a time, mixing on low speed until combined, then increasing to medium-high.
- Add Liquid & Flavor: Beat in the milk (or cream), vanilla extract, and salt. Continue to beat on medium-high for 3-5 minutes, until the frosting is light, fluffy, and smooth. If it’s too thick, add more milk, a teaspoon at a time. If it’s too thin, add more sifted powdered sugar.
- Color (Optional): If coloring, divide the buttercream into separate bowls and mix in gel food coloring until you achieve your desired shades.
How to Decorate Your Buttercream Sugar Cookies
This is where the magic happens! Once your cookies are cool and your buttercream is ready, here are 5 dazzling ways to decorate:
- Classic Swirl: The go-to for a reason! Fit a piping bag with a star tip (like 1M or 21) and pipe a beautiful swirl starting from the center and working your way out, or in traditional rosette fashion. Finish with sprinkles! This looks especially elegant with pastel colors.
- Smooth Glaze Effect: For a clean, modern look, use a round tip (like Wilton 5 or 7) to outline the cookie first, then flood the center with slightly thinned buttercream (add a tiny bit more milk) and gently spread with an offset spatula or toothpick. Let it set slightly. You can then pipe borders or details on top.
- Two-Tone Ombré: Load two complementary colors of buttercream side-by-side into the same piping bag (without mixing them completely). As you pipe a swirl or border, the colors will blend beautifully for a stunning ombré effect.
- Textured Brush Strokes: Spread a thin layer of buttercream over the cookie. While wet, use a small, clean food-safe paintbrush or the back of a spoon to create swirls, lines, or feathering for an artistic look.
- Sprinkle Extravaganza: Pipe a simple layer of buttercream (any tip works, or just spread it with a knife) and then immediately drench the cookie in a variety of sprinkles, nonpareils, or sanding sugars. This is always a kid-pleaser and adds fantastic crunch!
How to Serve Buttercream Sugar Cookies
These beautiful cookies are truly versatile! Serve them as the star of your dessert platter for any gathering – holidays, birthdays, or just a cozy afternoon tea. They’re also fantastic edible gifts, packaged in pretty boxes or cellophane bags. Pair them with a warm cup of coffee, a glass of cold milk, or even as a cheerful addition to a brunch spread. For a show-stopping display, arrange them on a tiered stand, showcasing all your creative decorations!
The Best Way to Save Extras
Proper storage is key to keeping your decorated cookies fresh and delicious.
- At Room Temperature: Once the buttercream has set (which takes about 30 minutes to an hour, depending on humidity), store the cookies in an airtight container at room temperature for up to 3-4 days. You can layer them between sheets of parchment paper to prevent sticking.
- In the Refrigerator: If your buttercream contains fresh cream cheese or if your kitchen is very warm, you can store them in an airtight container in the refrigerator for up to a week. Let them come to room temperature for about 15-20 minutes before serving for optimal texture and flavor.
- Freezing: For longer storage, flash freeze the undecorated baked cookies in a single layer on a baking sheet until firm (about 30 minutes). Then, transfer them to a freezer-safe bag or airtight container for up to 3 months. Thaw at room temperature before decorating. You can also freeze decorated cookies, but ensure the buttercream is completely set, and then place them carefully in an airtight container layering with parchment paper. Thaw in the refrigerator, then bring to room temperature.
Tricks for Success
Want your Buttercream Sugar Cookies to be absolutely perfect every time? Here are a few pro tips:
- Don’t Skimp on Chilling: Chilling the dough isn’t optional; it’s critical. It prevents the cookies from spreading too much in the oven, ensuring your cut-out shapes remain distinct.
- Room Temperature Ingredients: For both the cookies and the buttercream, ensure your butter and eggs are at proper room temperature. This helps everything combine smoothly for a consistent texture.
- Sift Your Powdered Sugar: For the smoothest buttercream imaginable, always sift your powdered sugar. No one wants lumpy frosting!
- Don’t Overbake: Sugar cookies are best when they’re just barely golden at the edges. Overbaking will make them dry and crumbly.
- Quality Extracts: Use good quality vanilla or almond extract. It makes a noticeable difference in the final flavor.
- Clean Your Cookie Cutters: After each cut, dip your cookie cutter in flour to prevent sticking, especially with intricate shapes.
Creative Twists
While the classic combo is fantastic, don’t be afraid to experiment!
- Flavor Swaps: Instead of plain vanilla extract, try almond, lemon, peppermint (especially for holidays!), or even a touch of orange zest in your cookie dough or buttercream.
- Spice It Up: Add a pinch of cinnamon, nutmeg, or cardamom to your cookie dough for a warmer, more aromatic flavor profile.
- Fillings: For an extra surprise, make sandwich cookies! Pipe buttercream onto one cookie and top with another.
- Chocolate Drizzle: After the buttercream has set, add a contrasting drizzle of melted chocolate (white, milk, or dark) across your decorated cookies.
- Edible Glitter/Dust: For a touch of sparkle, lightly brush edible glitter or luster dust onto your finished and set buttercream.
Common Questions
Why did my sugar cookies spread so much?
A: The most common culprit is not chilling the dough enough. Warm dough, or dough with too much butter (sometimes from not measuring correctly), can cause excessive spreading. Ensure your butter is softened, not melted, and always chill for at least an hour.Can I use store-bought frosting?
A: While you can use store-bought frosting in a pinch, homemade buttercream offers a superior flavor and texture that truly elevates these cookies. It’s also much easier to pipe and holds its shape better for intricate decorations.How far in advance can I make these cookies?
A: The cookie dough can be made and refrigerated for up to 2 days, or frozen for up to 3 months. Baked, undecorated cookies can be stored in an airtight container for a week or frozen for 3 months. Once decorated, they are best enjoyed within 3-4 days at room temperature.What if my buttercream is too stiff or too runny for piping?
A: If it’s too stiff, add milk (or cream) one teaspoon at a time, beating after each addition, until you reach the desired consistency. If it’s too runny, add more sifted powdered sugar, a tablespoon at a time, mixing well until it thickens up.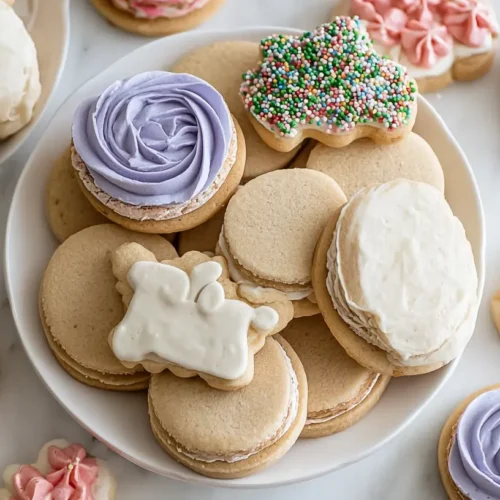
Classic Buttercream Sugar Cookies
Equipment
- large bowl
- electric mixer
- medium bowl
- plastic wrap
- baking sheets
- parchment paper
- cookie cutters
- wire rack
- offset spatula
- piping bag
- piping tips (round, star, leaf, petal)
Ingredients
For the Sugar Cookies:
- 1 cup unsalted butter, softened
- 1.5 cups granulated sugar
- 2 large eggs
- 1 teaspoon vanilla extract
- 3 cups all-purpose flour
- 1 teaspoon baking powder
- 0.5 teaspoon salt
For the Buttercream Frosting:
- 1 cup unsalted butter, softened
- 4-5 cups powdered sugar, sifted adjust to desired consistency
- 0.25 cup milk or heavy cream
- 1 teaspoon vanilla extract
- salt optional
- Gel food coloring various colors, if desired
Instructions
For the Sugar Cookies:
- Cream softened butter and granulated sugar with an electric mixer until light and fluffy for 2-3 minutes.
- Beat in eggs one at a time, then mix in vanilla extract until well combined, scraping the bowl as needed.
- Whisk together flour, baking powder, and salt in a separate medium bowl.
- Gradually add dry ingredients to wet ingredients, mixing on low speed until just combined without overmixing.
- Divide dough in half, flatten each into a disk, wrap tightly, and refrigerate for at least 1 hour to prevent spreading.
- Preheat oven to 375°F (190°C) and line baking sheets with parchment paper.
- Roll out dough on a lightly floured surface to ¼-inch thickness and cut into shapes using cookie cutters.
- Transfer cut cookies to prepared baking sheets, leaving 1 inch between them, and bake for 8-10 minutes until edges are lightly golden.
- Cool cookies on the baking sheet for 5 minutes, then move to a wire rack to cool completely before decorating.
For the Buttercream Frosting:
- Beat softened butter on medium speed for 2 minutes until creamy.
- Gradually add sifted powdered sugar, one cup at a time, mixing on low then increasing to medium until fluffy.
- Beat in milk (or cream) and vanilla extract, adding a pinch of salt if desired; beat for 3-5 minutes until light and fluffy, adjusting thickness with more milk or powdered sugar.
- If coloring, divide buttercream, add a tiny amount of gel food coloring to each bowl, and mix until desired colors are achieved.
- Scoop buttercream onto the center of a cooled cookie and spread with an offset spatula or spoon, making swirls; add sprinkles immediately if desired.
- Fit a piping bag with a round or star tip and fill with buttercream; outline the cookie edge, then fill the center with piped lines.
- Optionally, smooth the filled area with an offset spatula or damp paintbrush and add sprinkles while the frosting is wet.
- Use various piping tips (leaf, petal, small star) to create designs like rosettes, leaves, and dots by experimenting with pressure and angles for unique textures.