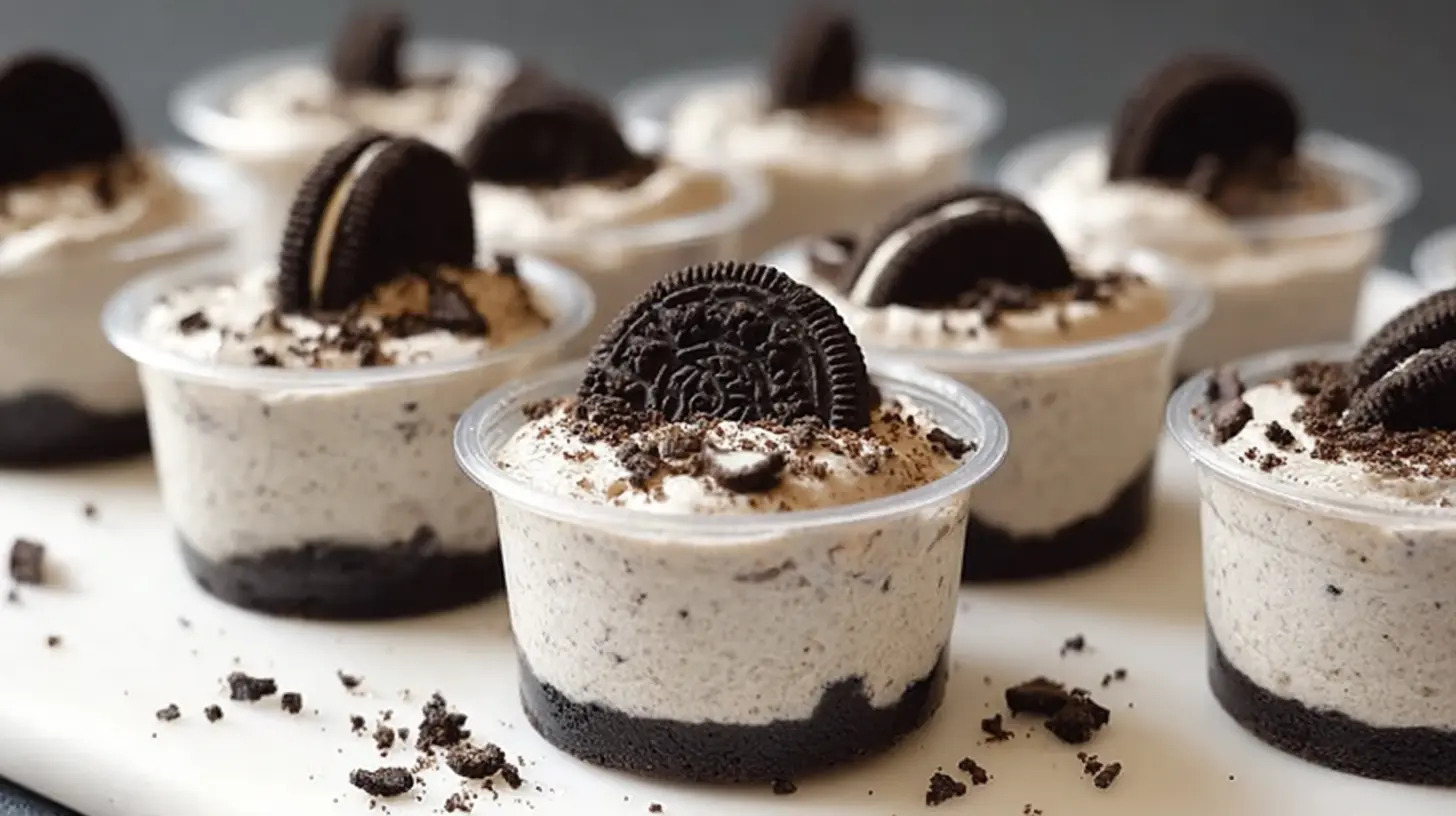
I remember the first time I whipped up a batch of these Cookies and Cream Dessert Cups; it was for a last-minute get-together, and honestly, I was looking for something impressive without the fuss. What I discovered was a dessert that disappeared faster than I could blink, leaving everyone asking for the recipe. These aren’t just dessert cups; they’re little individual moments of pure joy, combining the classic crunch of cookies with a dreamy, creamy filling.
Why You’ll Love This Dish
If you’re anything like me, you appreciate a dessert that delivers on both flavor and convenience. These Cookies and Cream Dessert Cups are a genuine winner on both fronts. They’re incredibly simple to assemble, making them ideal for those times you need a show-stopping treat but are short on time. Think weeknight craving busters, easy party desserts where everyone gets their own, or a delightful finish to a family dinner without the hassle of baking. Plus, who can resist the timeless combination of chocolate cookies and sweet cream? It’s pure nostalgia in a cup!
> “These dessert cups are my go-to for parties! They look fancy but are ridiculously easy to make. Everyone always raves about them.” – A happy dessert creator
How This Recipe Comes Together
Making these Cookies and Cream Dessert Cups involves a few straightforward steps, setting you up for success even if you’re a beginner in the kitchen. First, you’ll prepare your cookie base, layering crushed cookies in individual serving cups. Next, you’ll whip up a luscious, creamy filling that’s light yet decadent. Finally, you’ll layer these elements, creating a visually appealing and incredibly tasty dessert that’s ready to chill and enjoy. It’s a no-bake wonder that truly lets the classic flavors shine.
Gather These Items
Here’s what you’ll need to create these irresistible dessert cups:
- Oreos (or similar chocolate sandwich cookies): About 20-25 cookies, crushed. These form the essential cookie layers.
- Cream Cheese: 8 ounces, softened. Make sure it’s at room temperature for a smooth, lump-free filling.
- Powdered Sugar: 1/2 cup (or to taste). This sweetens the cream cheese mixture.
- Vanilla Extract: 1 teaspoon. Enhances the overall flavor profile.
- Whipped Topping (like Cool Whip): 8 ounces, thawed. Provides that light, airy texture to the filling.
- Milk: 1/4 cup (any kind). Helps to thin and blend the cream cheese mixture.
Directions to Follow
Let’s get those delicious Cookies and Cream Dessert Cups made!
- Crush the Cookies: Place the Oreos in a zip-top bag and crush them using a rolling pin or pulse them in a food processor until you have fine crumbs with a few larger pieces for texture. Set aside.
- Prepare the Creamy Filling: In a large bowl, using an electric mixer, beat the softened cream cheese until smooth. Add the powdered sugar and vanilla extract, beating until well combined and fluffy.
- Add Whipped Topping: Gently fold in the thawed whipped topping until no streaks remain. Be careful not to overmix, as this can deflate the whipped topping. Stir in the milk until the mixture is smooth and creamy.
- Assemble the Cups: Get your serving cups ready (small glasses, ramekins, or jars work perfectly). Start by spooning about 1-2 tablespoons of crushed cookies into the bottom of each cup.
- Layer the Cream: Top the cookie layer with a generous scoop of the cream cheese filling.
- Repeat and Finish: Add another layer of crushed cookies, followed by another layer of cream,
Then top with remaining crushed cookies for garnish.
- Chill: Cover the dessert cups and refrigerate for at least 2-4 hours, or preferably overnight, to allow the flavors to meld and the cups to set.
Best Ways to Enjoy It
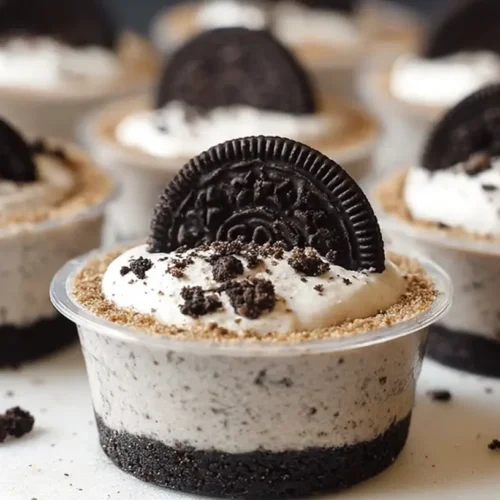
These Cookies and Cream Dessert Cups are fantastic as a stand-alone treat, but a little flair never hurts! For a touch of visual appeal, consider garnishing with a whole mini Oreo on top, a sprinkle of chocolate shavings, or even a fresh raspberry for a pop of color and tartness. They’re perfect sized for individual servings, making them ideal for potlucks, birthday parties, or a thoughtful surprise for a loved one. Offer them after a casual barbecue or as a sweet ending to a comforting family meal.
How to Store & Freeze
To keep your Cookies and Cream Dessert Cups fresh, store them covered in the refrigerator. They’ll stay delicious for up to 3-4 days. Because of the whipped topping and cream cheese, I don’t recommend freezing these as the texture can change significantly upon thawing. It’s best to enjoy them fresh after a good chill! Always ensure they are kept cold, especially if serving outdoors, to maintain their creamy consistency and ensure food safety.
Pro Chef Tips
- Soften Cream Cheese Properly: The biggest key to a smooth filling! If you forget to take it out ahead of time, you can microwave it for 10-15 seconds at a time until soft (but not melted).
- Don’t Overmix the Whipped Topping: Once you fold in the whipped topping, mix just until combined. Overmixing can cause it to lose its airy texture, resulting in a denser filling.
- Chill Time is Crucial: Don’t skip the chilling step! This allows the flavors to deepen and the dessert to firm up, making for a much more enjoyable experience. The cookies also soften slightly, creating a delightful contrast with the creamy filling.
- Use a Piping Bag: For a neater presentation, use a piping bag (or a zip-top bag with the corner snipped off) to pipe the creamy filling into the cups. This makes layering much easier and cleaner.
Recipe Variations
Feeling creative? These dessert cups are a fantastic canvas for experimentation!
- Minty Twist: Add a few drops of mint extract to the cream cheese filling for a refreshing mint-chocolate flavor.
- Peanut Butter Love: Swirl in a tablespoon or two of creamy peanut butter into the cream cheese mixture, or add a thin layer of peanut butter between the cookie and cream layers.
- Coffee Kick: Dissolve 1 teaspoon of instant espresso powder in 1 tablespoon of hot water, then cool and add to the cream cheese filling for a mocha-inspired treat.
- Fruity Freshness: Layer in some fresh berries (strawberries, raspberries) with the cookies and cream for a pop of color and tartness.
- Different Cookies: While Oreos are classic, try using other crushed sandwich cookies, shortbread, or even graham crackers for a different base.
Your Questions Answered
FAQ
Q: Can I use homemade whipped cream instead of store-bought whipped topping?
A: Yes, absolutely! Homemade whipped cream will give a richer, fresher taste. Just be aware that it might not be as stable as store-bought whipped topping, so the dessert cups might need to be consumed a bit sooner and kept very cold.
Q: How far in advance can I make these Cookies and Cream Dessert Cups?
A: You can assemble these dessert cups up to 2 days in advance. In fact, they often taste even better on the second day once the flavors have fully melded together and the cookie crumbs have softened slightly from the creamy layers.
Q: What if I don’t have individual serving cups?
A: No problem! You can easily make this into a larger trifle-style dessert in a single serving bowl or a 9×13-inch baking dish. Just layer the cookies and cream mixture as directed, chill, and then scoop out individual portions.
Classic No-Bake Cookies and Cream Dessert Cups
Equipment
- Medium bowl
- Dessert cups or jars
- Large bowl
- Mixer
Ingredients
Cookie Base
- 1 ½ cups chocolate sandwich cookies (like Oreos) crushed
- 4 tbsp unsalted butter, melted
Cream Cheese Filling
- 8 oz cream cheese softened
- ½ cup powdered sugar (confectioners’ sugar)
- 1 tsp vanilla extract
- 1 cup heavy cream chilled
- ½ cup chocolate sandwich cookies crushed, for folding into cream
Garnish
- chocolate sandwich cookies Whole or roughly chopped, for garnish (optional)
Instructions
Instructions
- Combine crushed chocolate sandwich cookies with melted unsalted butter in a medium bowl and mix well.
- Divide the mixture among 6-8 dessert cups, press firmly to form a base, and refrigerate while preparing the filling.
- In a large bowl, beat softened cream cheese with powdered sugar until smooth, then stir in vanilla extract.
- In a separate chilled bowl, whip heavy cream until stiff peaks form.
- Gently fold the whipped cream into the cream cheese mixture until just combined, being careful not to overmix.
- Gently fold the additional crushed chocolate sandwich cookies into the creamy mixture.
- Spoon or pipe the creamy mixture over the chilled cookie bases, filling the cups about two-thirds full.
- Add a layer of crushed cookie crumbs over the creamy layer in each cup.
- Add another layer of the creamy mixture, filling the cups to the top.
- Cover and refrigerate for at least 4 hours, or preferably overnight, to allow flavors to meld and the dessert to set.
- Garnish each cup with extra crushed cookie crumbs, a whole cookie, or whipped cream before serving chilled.