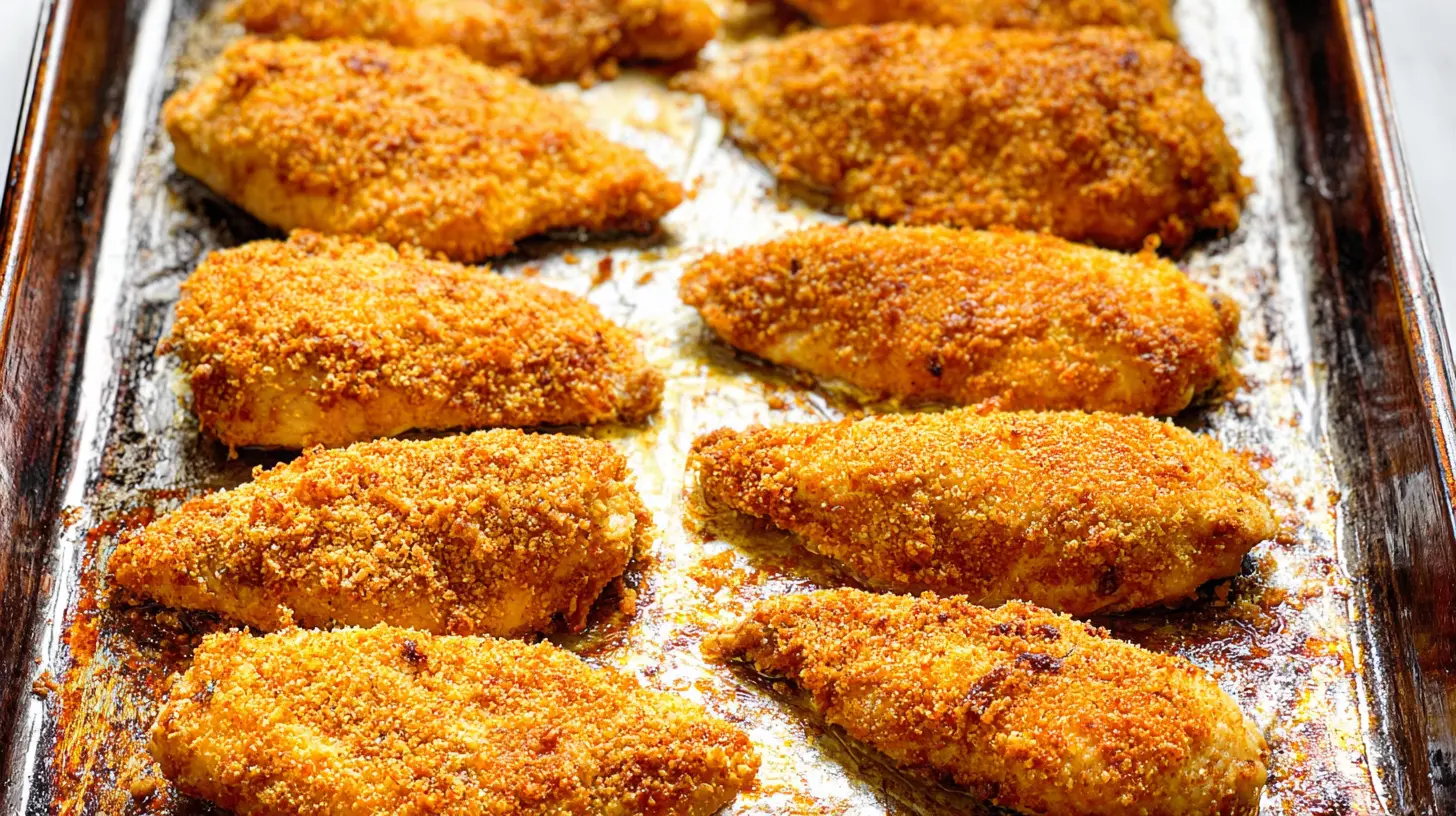
I’ve always been on a quest for the holy grail of weeknight dinners: that perfectly crispy, incredibly flavorful baked chicken that doesn’t sacrifice juiciness. For years, I struggled with chicken that turned out a little too… well, soggy or surprisingly dry. But after countless experiments and a few culinary mishaps, I’ve finally cracked the code to what I now affectionately call the Crispy Oven-Baked Chicken Dinner. It’s not just a meal; it’s an experience, transforming a simple ingredient into something truly special with a satisfying crunch in every bite.
Why You’ll Love This Dish
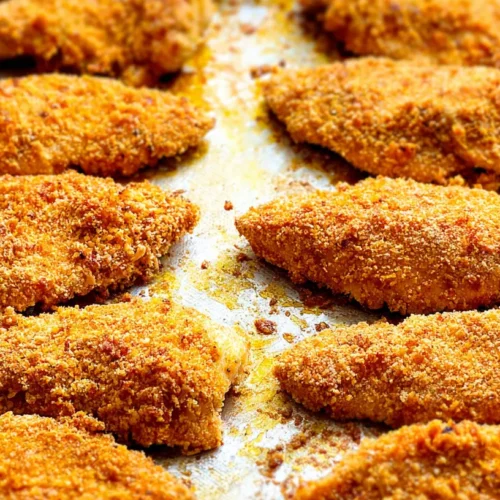
If you’ve ever dreamt of pulling a tray out of the oven to reveal golden-brown, irresistibly crispy chicken without the hassle of deep-frying, then this recipe is your new best friend. This Crispy Oven-Baked Chicken Dinner isn’t just about achieving that coveted crunch; it’s about making weeknight meals feel a little more gourmet, a lot less stressful, and incredibly satisfying. It’s a fantastic option because it minimizes cleanup compared to pan-frying, allows you to cook a larger batch easily, and the oven does most of the heavy lifting. This dish is perfect for a cozy family dinner, a casual get-together with friends, or even meal prepping for the busy week ahead.
> “I used to shy away from baking chicken because it never got truly crispy. This recipe changed everything! The skin was incredibly crunchy, and the meat stayed so moist. My family devoured it!” – A Happy Home Cook
Preparing Crispy Oven-Baked Chicken Dinner
The journey to perfect crispy chicken begins with understanding a few key principles. It’s not just about tossing chicken into the oven; it’s about creating the right environment for that magical transformation. We’ll be focusing on optimizing skin texture and ensuring the meat remains tender and juicy. The basic process involves preparing the chicken, applying a special seasoning and coating blend, and then baking it at a specific temperature to achieve maximum crispiness.
What You’ll Need
Here’s what you’ll want to gather from your pantry and fridge to create this show-stopping Crispy Oven-Baked Chicken Dinner. Don’t worry, most of these are likely staples!
- Bone-in, skin-on chicken pieces: Thighs, drumsticks, or a mix work best for ultimate crispiness and flavor. (Using skin-on is crucial for the crisp, and bone-in adds flavor and helps keep the meat moist.)
- Olive oil: Or another neutral oil with a high smoke point.
- Baking powder: This is one of our secret weapons! (Don’t confuse it with baking soda; baking powder helps draw moisture from the skin, promoting incredible crispiness.)
- Smoked paprika: For a lovely color and smoky depth.
- Garlic powder: A must-have for savory flavor.
- Onion powder: Adds another layer of aromatic goodness.
- Dried oregano or thyme: For a hint of herby freshness.
- Salt and freshly ground black pepper: To taste, essential for seasoning.
- Optional add-ins: A pinch of cayenne pepper for a little heat, or some lemon zest for brightness.
Directions to Follow
Let’s get this perfectly crispy chicken in the oven! Follow these steps closely for the best results.
- Prep the Chicken: Pat your chicken pieces very dry with paper towels. This is a critical step for crispiness, as excess moisture prevents browning. Trim any large excess fat from the edges.
- Make the Crispy Coating: In a small bowl, whisk together the baking powder, smoked paprika, garlic powder, onion powder, dried oregano (or thyme), salt, and black pepper.
- Season the Chicken: Drizzle the chicken pieces with olive oil, ensuring they are lightly coated. Then, sprinkle the baking powder mixture generously over all sides of the chicken, using your hands to rub it in well, getting under the skin if possible.
- Arrange for Airflow: Place a wire rack on a baking sheet. Arrange the seasoned chicken pieces in a single layer on the wire rack, ensuring there’s space between each piece for proper air circulation.
- Chill (Optional, but Recommended): For maximum crispiness, place the uncovered baking sheet with the chicken in the refrigerator for at least 1 hour, or preferably 4 hours up to overnight. This further dries out the skin.
- Preheat Your Oven: Preheat your oven to a high temperature, typically 400°F (200°C). A hot oven is key to rendering the fat and achieving a crispy skin quickly.
- Bake to Perfection: Bake the chicken for 35-50 minutes, depending on the size of your pieces and the type of cut. The skin should be deeply golden brown and incredibly crispy, and an instant-read thermometer inserted into the thickest part of the meat (avoiding the bone) should register 165°F (74°C).
- Rest and Serve: Once cooked, remove the chicken from the oven and let it rest on the wire rack for 5-10 minutes before serving. This allows the juices to redistribute, ensuring tender, moist meat.
Best Ways to Enjoy It
This Crispy Oven-Baked Chicken Dinner is fantastic on its own, but it truly shines when paired with complementing side dishes. For a classic, comforting meal, I love serving it with creamy mashed potatoes and steamed green beans or asparagus. If you’re looking for something lighter, a fresh, vibrant salad with a lemon vinaigrette is an excellent choice. Roasted root vegetables like carrots, parsnips, or sweet potatoes also make a wonderful accompaniment, as they can roast alongside the chicken in the oven (just make sure they don’t overcrowd the pan!). The crisp skin makes it appealing to kids and adults alike, so don’t be surprised if it becomes a regular request!
How to Store & Freeze
Proper storage is key to enjoying your crispy chicken leftovers. Once the chicken has cooled completely to room temperature (within two hours of cooking), transfer it to an airtight container.
- Refrigeration: It will keep well in the refrigerator for 3-4 days.
- Reheating: To revive some of that crispiness, avoid the microwave! Reheat leftover chicken in a preheated oven or air fryer at 350°F (175°C) until warmed through and the skin has re-crisped, about 10-15 minutes.
- Freezing: While you can freeze cooked chicken, the skin won’t retain its crispiness after thawing and reheating. If you choose to freeze, remove the skin first. Freeze the cooked chicken (without skin) in an airtight, freezer-safe container or bag for up to 3 months. Thaw in the refrigerator overnight before reheating.
Helpful Cooking Tips
Achieving that perfect crispy, juicy balance isn’t hard, especially with these extra pointers:
- Don’t skip the patting dry process! This is perhaps the single most important step for crispy skin. Moisture is the enemy of crisp.
- Baking Powder Magic: Ensure you use aluminum-free baking powder. The small amount won’t affect the taste, but it’s crucial for the chemical reaction that draws out moisture and creates micro-bubbles for that satisfying crunch.
- Give it Space: Don’t crowd the baking sheet. Overcrowding lowers the temperature and steams the chicken instead of crisping it. Cook in batches if necessary.
- High Heat to Start (or All the Way): Starting with a high temperature helps render the fat and get the skin incredibly crispy. Some recipes even suggest starting higher (425°F/220°C) for the first 15-20 minutes, then lowering it to 375°F (190°C) to finish cooking through without burning the skin. For this recipe, consistent 400°F works wonderfully.
- Use a Wire Rack: This allows air to circulate all around the chicken pieces, preventing the bottom from getting soggy. Don’t skip it!
- The Chill Factor: If you have the time, chilling the seasoned chicken uncovered in the fridge for a few hours (or overnight) is a game-changer. It further dries out the skin, leading to unparalleled crispiness.
- Meat Thermometer is Your Friend: Always use an instant-read thermometer to ensure the chicken is cooked to a safe internal temperature of 165°F (74°C) without overcooking.
Creative Twists
While the classic Crispy Oven-Baked Chicken is delicious, you can certainly mix things up to keep your taste buds excited!
- Spice it Up: Add a pinch of cayenne pepper, chili flakes, or even a dash of smoked chipotle powder to your seasoning mix for a fiery kick.
- Herbaceous Heaven: Incorporate finely chopped fresh rosemary or sage along with the dried herbs for an elevated, aromatic flavor profile.
- Lemon-Herb Infusion: Before baking, tuck lemon slices and extra fresh herb sprigs (like thyme or rosemary) under and around the chicken pieces on the baking sheet.
- Parmesan Crust: In the last 10-15 minutes of baking, sprinkle some finely grated Parmesan cheese over the chicken skin. It will melt and crisp up, adding a salty, savory crust.
- Glaze It: For the last 10 minutes, brush the chicken with a mixture of honey and a little apple cider vinegar, or a savory BBQ sauce, for a sweet and tangy finish (just be careful not to burn the glaze).
Common Questions
How do I prevent the chicken from drying out while getting it crispy?
The key here is a combination of factors: using bone-in, skin-on chicken (the skin acts as a protective layer, and the bone helps with even cooking), not overcooking it (use a meat thermometer!), and utilizing the high heat to quickly render the fat and crisp the skin while the internal temperature rises. Resting the chicken after baking is also crucial for juicy results.
Can I use boneless, skinless chicken breasts for this recipe?
While you can technically bake boneless, skinless breasts, this recipe is specifically designed to maximize crispiness, which relies heavily on the skin. You won’t achieve the same golden, crunchy exterior without the skin. Boneless, skinless pieces also cook faster and are more prone to drying out. If using them, reduce cooking time significantly and watch temperature closely.
What’s the deal with baking powder? Does it make the chicken taste weird?
No! When used in small amounts, baking powder does not impart any noticeable flavor. Its magic lies in its alkalinity, which raises the pH level of the chicken skin. This helps break down proteins and creates tiny bubbles, leading to a drier, more brittle, and ultimately crispier surface. Just be sure to use baking powder, not baking soda, which has a much stronger, bitter taste.
Classic Crispy Oven-Baked Chicken Dinner
Equipment
- paper towels
- small bowl
- baking sheet
- wire rack (optional)
- instant-read thermometer
Ingredients
Main Ingredients
- 4 bone-in, skin-on chicken thighs or drumsticks approximately 1.5-2 lbs total
- 2 tablespoons olive oil
Seasoning Blend
- 1 tablespoon smoked paprika
- 1 teaspoon garlic powder
- 1 teaspoon onion powder
- 1 teaspoon dried thyme or oregano
- 1 teaspoon salt
- 1/2 teaspoon black pepper
- 1/4 teaspoon cayenne pepper optional
Instructions
Preparation
- Pat the chicken pieces very dry with paper towels to ensure crispy skin.
- In a small bowl, combine smoked paprika, garlic powder, onion powder, dried thyme, salt, black pepper, and cayenne (if using).
- Drizzle the chicken with olive oil, then rub the seasoning mixture all over each piece, ensuring it gets under the skin as well.
Cooking
- Preheat your oven to 400°F (200°C); use a wire rack on a baking sheet for maximum crispness if available.
- Place the seasoned chicken pieces, skin-side up, on the wire rack or lightly oiled baking sheet, ensuring they do not touch.
- Bake for 35-45 minutes, or until the internal temperature reaches 165°F (74°C) and the skin is deeply golden and crispy.
Resting
- Remove the chicken from the oven and let it rest for 5-10 minutes before serving to allow juices to redistribute, ensuring tender and moist meat.