I’ve always been a grazer, forever on the hunt for that perfect pick-me-up between meals. A few years ago, I stumbled upon the magic of homemade nut bars, and honestly, they’ve been a game-changer. There’s something incredibly satisfying about biting into a chewy, crunchy bar that’s packed with good-for-you ingredients, especially when it’s got that irresistible combination of rich dark chocolate and a hint of sea salt. It feels indulgent, yet you know you’re fueling your body right. These Dark Chocolate and Sea Salt Nut Bars aren’t just another snack recipe; they’re a smart, delicious solution to those mid-day hunger pangs and a testament to how one mindful choice can truly make a difference in your day.
Why you’ll love this dish
You know that feeling when you’re craving something sweet, but also something that’s going to actually keep you full and energized? That’s exactly where these Dark Chocolate and Sea Salt Nut Bars shine. They hit all the right notes: the deep, slightly bitter richness of dark chocolate perfectly balances the sweet and salty crunch of the nuts and seeds. It’s not just about taste, though. These bars are a powerhouse of healthy fats, fiber, and protein, making them an ideal way to boost your energy naturally without the sugar crash that often comes with less mindful snacks. Whether you’re looking for a quick breakfast on the go, a post-workout refuel, or just a smarter treat to quiet those afternoon cravings, these bars are the ultimate healthy indulgence.
> “These bars are a lifesaver! I used to grab unhealthy snacks all the time, but now I make a batch of these every Sunday. They’re so satisfying and genuinely delicious – my kids even love them!” – A Happy Home Cook
Preparing Dark Chocolate and Sea Salt Nut Bars
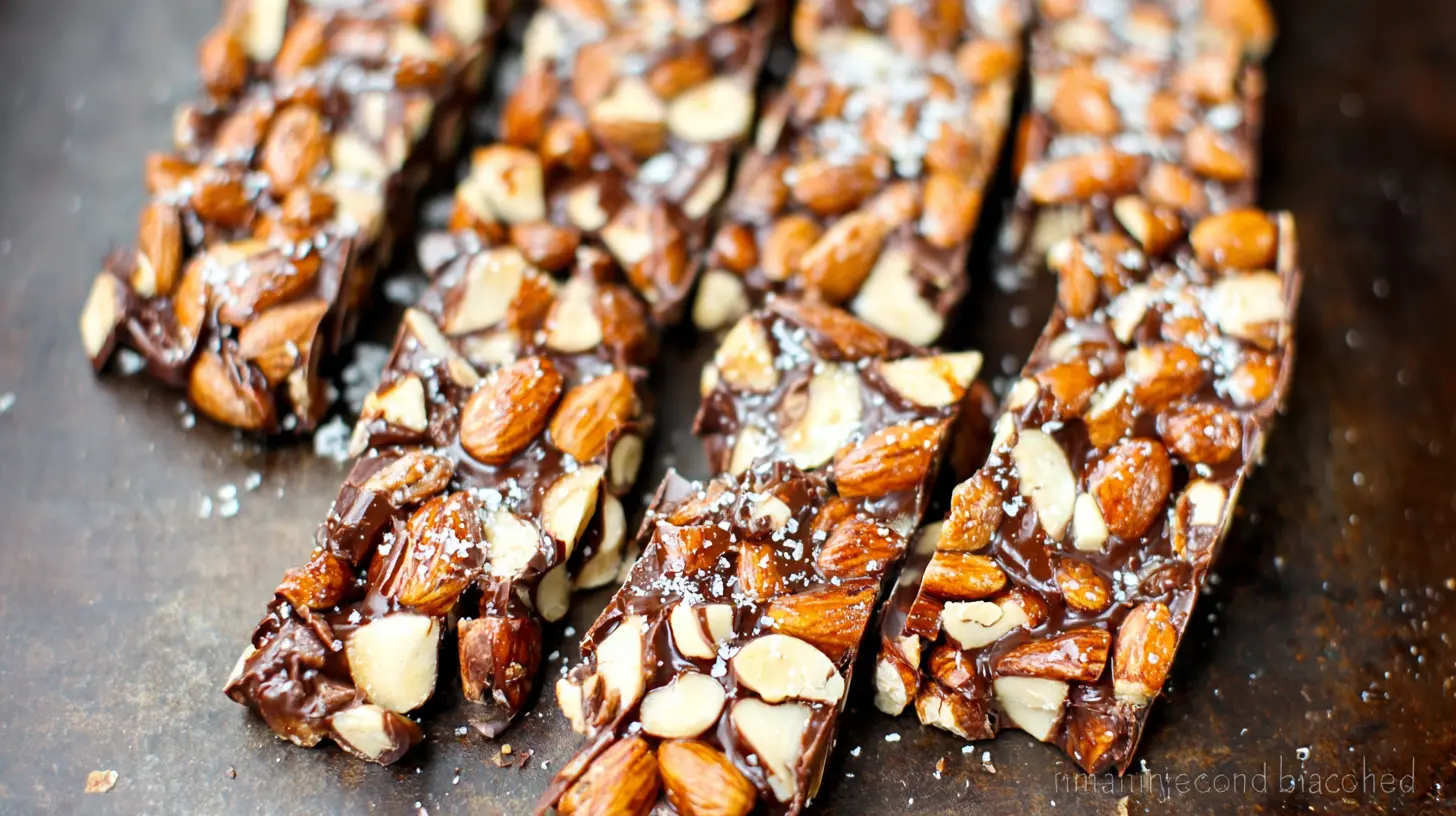
Making these delightful nut bars is surprisingly straightforward, even if you’re not a seasoned baker. The foundational steps involve toasting the nuts and seeds to bring out their incredible flavor, then binding everything together with a sticky-sweet mixture that hardens perfectly. Finally, a decadent layer of melted dark chocolate and a sprinkle of flaky sea salt elevates them from good to absolutely irresistible. It’s a process that requires minimal fuss but delivers maximum reward, allowing you to whip up a batch relatively quickly and have healthy snacks on hand for days.
Ingredients
Gather these items
- 2 cups mixed nuts: (e.g., almonds, cashews, pecans, walnuts, peanuts) raw and unsalted are best for control over flavor.
- 1/2 cup seeds: (e.g., pumpkin seeds, sunflower seeds, chia seeds, flax seeds) adds extra crunch and nutrients.
- 1/2 cup rolled oats: (not instant) for chewiness and binding.
- 1/2 cup nut butter: (e.g., almond butter, peanut butter, cashew butter) natural, unsweetened, and creamy is ideal.
- 1/4 cup honey or maple syrup: your choice for natural sweetness and binding.
- 1/4 cup coconut oil: helps bind and provides a slight coconut flavor; refined coconut oil if you prefer no coconut taste.
- 1 teaspoon vanilla extract: enhances all the flavors.
- 1/4 teaspoon salt: a pinch to balance the sweetness.
- 6 oz dark chocolate: (60-75% cocoa solids) chopped or in chips, for melting.
- 1-2 teaspoons flaky sea salt: for sprinkling on top.
Directions to follow
- Prep the Pan: Line an 8×8 inch baking pan with parchment paper, leaving an overhang on two sides to easily lift the bars out later. This is a crucial step for clean removal!
- Toast Nuts & Seeds: Preheat your oven to 300°F (150°C). Spread the mixed nuts, pumpkin seeds, and sunflower seeds (if using a mix that includes them) on a baking sheet. Toast for 8-10 minutes, stirring halfway, until fragrant. Let them cool slightly, then roughly chop any larger nuts.
- Combine Dry Ingredients: In a large bowl, combine the toasted nuts, seeds (including chia and flax if using), and rolled oats.
- Make the Binder: In a small saucepan over medium-low heat, gently melt together the nut butter, honey (or maple syrup), coconut oil, vanilla extract, and 1/4 teaspoon salt. Stir until everything is well combined and smooth. Be careful not to boil it.
- Mix & Press: Pour the warm binder mixture over the dry ingredients. Mix thoroughly with a spatula until everything isevenly coated. Transfer the mixture to your prepared baking pan. Using the back of the spatula or your hands (lightly greased if it’s too sticky), press the mixture down very firmly and evenly into the pan. Compressing it well is key to bars that hold together.
- Chill Time: Place the pan in the refrigerator for at least 30 minutes (or freezer for 15-20 minutes) to set firmly.
- Melt the Chocolate: While the bars are chilling, melt the dark chocolate. You can do this in a microwave (heating in 30-second intervals, stirring between each, until smooth) or using a double boiler method.
- Chocolate & Salt Top: Once the nut mixture is firm, lift it out of the pan using the parchment paper overhang. Pour the melted dark chocolate evenly over the top, spreading it with a spatula. Immediately sprinkle with flaky sea salt.
- Final Chill & Cut: Return the slab to the refrigerator for another 15-20 minutes, or until the chocolate layer is completely set. Once firm, use a sharp knife to cut into 12-16 bars or squares. For cleaner cuts, you can warm your knife slightly under hot water and wipe it dry between cuts.
How to serve Dark Chocolate and Sea Salt Nut Bars
These versatile bars are perfect for almost any occasion! They make a fantastic on-the-go breakfast when you’re rushing out the door, providing sustained energy to kickstart your day. Pack one in your lunch bag for a satisfying mid-day treat that wards off the afternoon slump. They’re also an excellent pre- or post-workout snack, offering a good balance of carbs and protein for fuel and recovery. For a more indulgent moment, enjoy one with your afternoon tea or coffee. And let’s be honest, sometimes you just need a healthy-ish dessert to satisfy that sweet tooth, and these bars fit the bill perfectly. They’re hearty enough to keep you full but delicious enough to feel like a treat.
Keeping leftovers fresh
To keep your Dark Chocolate and Sea Salt Nut Bars at their best, store them in an airtight container in the refrigerator for up to 1-2 weeks. The cool temperature helps maintain their firm texture and prevents the chocolate from softening too much, especially in warmer climates. If you want to extend their shelf life even further, you can freeze them! Wrap individual bars tightly in parchment paper or plastic wrap, then place them in a freezer-safe bag or container. They’ll keep well in the freezer for up to 2-3 months. When you’re ready to enjoy one, simply let it thaw at room temperature for about 10-15 minutes, or enjoy it straight from the freezer for a super chewy, extra-chilled treat. Always ensure they are completely cool before storing to prevent condensation.
Helpful cooking tips
- Don’t Skip the Toasting: Toasting the nuts and seeds is crucial. It brings out their natural oils, intensifying their flavor and adding a depth that raw nuts just can’t match. Keep an eye on them though, as they can burn quickly.
- Press Firmly: When you’re pressing the mixture into the pan, really put some muscle into it. A tightly packed base is the secret to bars that don’t crumble when cut. You can use the bottom of a glass or a clean, greased hand to get an even, compact layer.
- Chill Time is Key: Don’t rush the chilling process. Allowing the bars to set completely before cutting ensures clean edges and prevents them from falling apart. If your kitchen is warm, a longer chill time (or a stint in the freezer) might be needed.
- Warm Your Knife: For super neat cuts through the chocolate layer, dip your knife in hot water and wipe it dry before slicing. Repeat this for each cut, and you’ll get those beautiful, uncracked chocolate tops.
Creative twists
- Spice It Up: Add a pinch of cinnamon, nutmeg, or even a tiny dash of cayenne pepper to the nut mixture for a warm, unexpected kick that pairs beautifully with dark chocolate.
- Different Dried Fruits: While not in the original recipe, a quarter cup of finely chopped dried cranberries, cherries, or apricots can add a lovely chewy texture and tangy sweetness. Stir them in with the nuts and oats.
- Seed Swaps: Experiment with different seeds! Hemp hearts, sesame seeds, or black sesame seeds can offer new nutritional profiles and textures.
- Nut Butter Variations: Cashew butter or sunflower seed butter can offer a different flavor profile, especially if you’re looking for a nut-free option (though check for overall allergen safety if making for someone with severe allergies).
- White Chocolate Drizzle: Instead of a full dark chocolate top, you could do a dark chocolate base and then drizzle with melted white chocolate for a striking visual and an extra layer of sweetness.
- Protein Boost: Stir in a scoop of your favorite unflavored or vanilla protein powder to the dry mixture for an extra protein punch, just be mindful it might make the mixture slightly drier, so adjust binder if needed.
Common questions
How long do these Dark Chocolate and Sea Salt Nut Bars last?
When stored in an airtight container in the refrigerator, these bars will stay fresh and delicious for 1-2 weeks. They can also be frozen for up to 2-3 months.Can I make these bars gluten-free?
Absolutely! Make sure to use certified gluten-free rolled oats, as some oats can be cross-contaminated with gluten during processing. All other ingredients in this recipe are naturally gluten-free.My bars are crumbling. What went wrong?
If your bars are falling apart, it’s likely due to one of two reasons: either the binder mixture wasn’t sufficient or, more commonly, the mixture wasn’t pressed firmly enough into the pan before chilling. Make sure to really compact the mixture down to create a dense, cohesive base. Also, ensure adequate chilling time before cutting.Can I use different sweeteners?
Yes, you can. Honey and maple syrup are recommended for their binding properties and natural sweetness. You could experiment with agave nectar, but the texture might vary slightly. Avoid granular sweeteners as they won’t bind the bars effectively.Are these bars suitable for vegans?
To make these bars vegan, ensure you use maple syrup instead of honey for the sweetener. Also, verify that your dark chocolate is vegan-friendly (many dark chocolates are, but always check the label for milk products).
Dark Chocolate and Sea Salt Nut Power Bars
Equipment
- Food processor
- 8×8 inch baking pan
- Parchment paper
Ingredients
Bar Mixture
- 1/2 cup almonds chopped
- 1/4 cup pumpkin seeds
- 1/4 cup sunflower seeds
- 2 tablespoons chia seeds
- 1/2 cup dates pitted and finely chopped
- 1/4 cup almond butter
- 2 tablespoons water or more, as needed
- sea salt Pinch of, for the mixture
Topping
- 1/2 cup dark chocolate chips dairy-free for vegan
- Flaky sea salt for sprinkling
Instructions
Preparation
- Pulse the pitted dates in a food processor until they form a sticky ball.
- Add chopped almonds, pumpkin seeds, sunflower seeds, chia seeds, almond butter, and a pinch of sea salt to the food processor. Pulse until the mixture is sticky and just comes together, adding water as needed.
- Firmly press the mixture into an 8×8 inch parchment-lined baking pan and refrigerate for at least 30 minutes.
- Melt the dark chocolate chips, then spread over the chilled bar mixture and sprinkle with flaky sea salt. Return to the refrigerator for another 30-60 minutes to set.
- Once firm, lift the mixture from the pan and slice into individual bars.