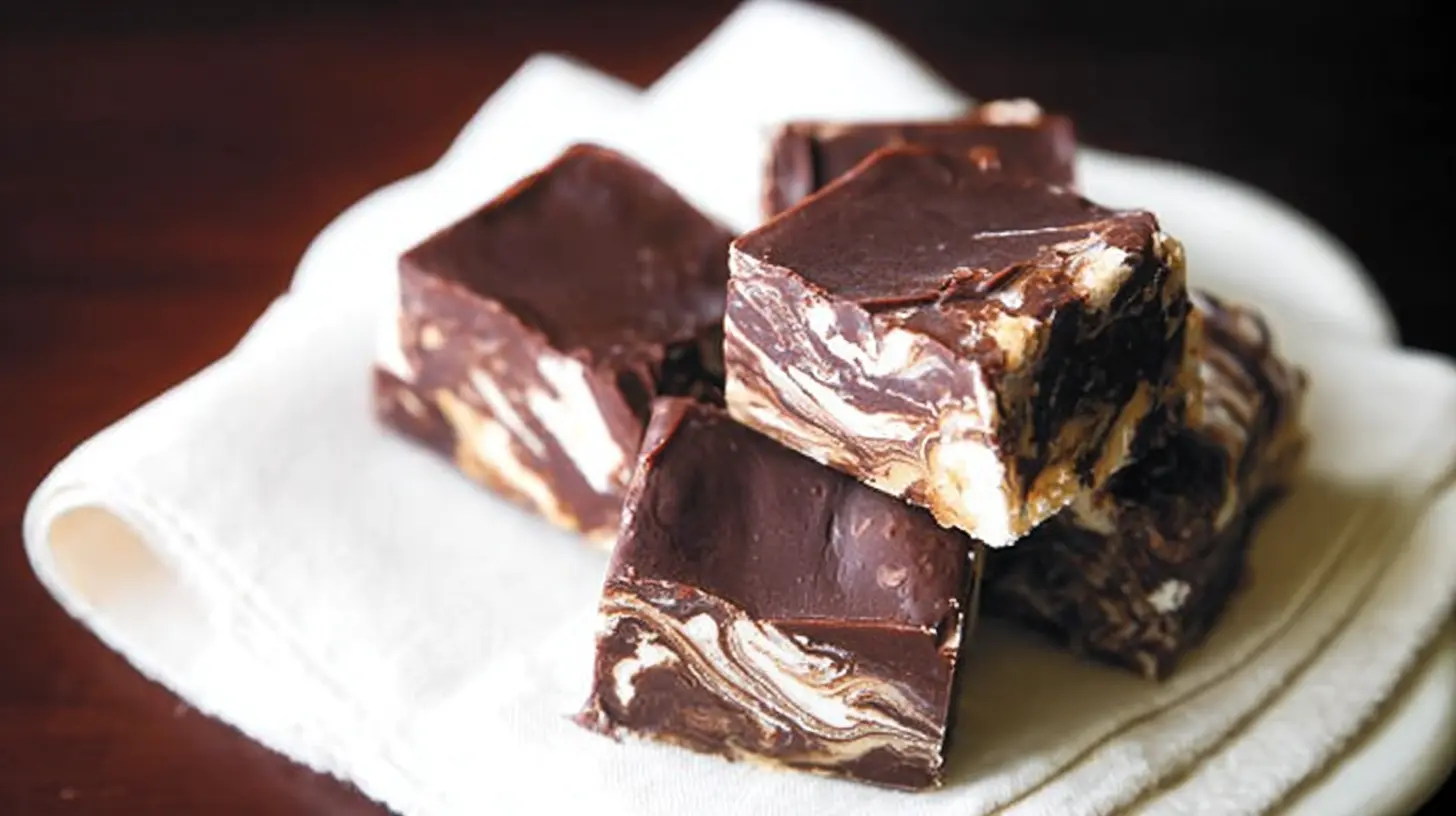
I remember the first time I attempted Marshmallow Swirl Fudge. I pictured a beautiful, ribboned confection, but what I got was a sticky, slightly seized mess that stubbornly refused to swirl. It was disheartening, to say the least! But that culinary mishap taught me a valuable lesson: fudge, while seemingly simple, thrives on precision and a few clever tricks. If you’ve ever dreamt of that perfectly smooth, rich chocolate base with ethereal marshmallow ribbons weaving through it, only to be met with disappointment, then you’re in the right place. This guide isn’t just about a recipe; it’s about unlocking the secrets to truly divine Marshmallow Swirl Fudge, transforming those sticky struggles into sweet success.
Why You’ll Love This Dish
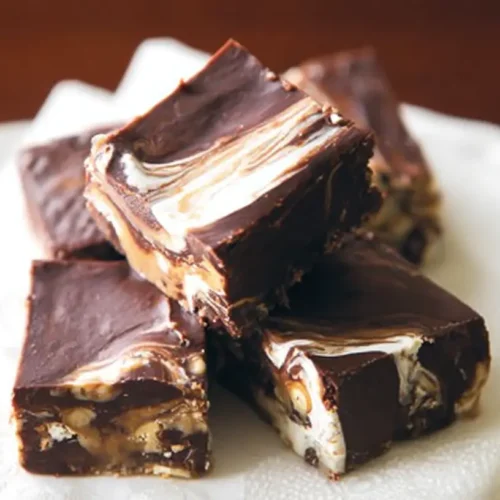
There’s something inherently nostalgic and utterly comforting about Marshmallow Swirl Fudge. It’s the kind of treat that instantly brings a smile to your face, whether it’s part of a holiday platter or a simple homemade gift. What makes this recipe specifically special is that it tackles the common pitfalls, ensuring you get that dreamy, creamy texture and beautiful swirl every single time. It’s surprisingly approachable once you know the tricks, making it a fantastic project for a cozy weekend in, a delightful addition to any potluck, or the perfect edible present for friends and family. No more lumpy or grainy fudge; just pure, melt-in-your-mouth perfection.
> “I used to shy away from making fudge because it always seemed too complicated. But these tips made all the difference! My Marshmallow Swirl Fudge turned out absolutely perfect – smooth, creamy, and those swirls were gorgeous. Everyone loved it!” — A baker from our community
How This Recipe Comes Together
Creating Marshmallow Swirl Fudge involves a few key stages that, when executed correctly, lead to an impressive and delicious result. First, you’ll prepare your baking pan, making sure it’s ready to receive the warm fudge. Next, the chocolate base comes together on the stovetop, a process that requires careful stirring and temperature control to achieve that iconic smooth, rich texture. Once the chocolate fudge is ready, a portion is quickly poured into the prepared pan. The magic then happens with the marshmallow layer: a simple yet crucial step where you quickly melt marshmallows and then strategically drizzle and swirl them into the chocolate base. Finally, a little patience is required as the fudge sets up in the refrigerator, transforming from a molten mixture into sliceable, decadent squares.
What You’ll Need
To embark on your Marshmallow Swirl Fudge adventure, gather these essential ingredients:
- Semi-sweet chocolate chips (or chopped chocolate): Quality matters here for the best flavor.
- Sweetened condensed milk: This is the key to fudge’s creamy texture and sweetness. Don’t confuse it with evaporated milk!
- Butter: Adds richness and helps with texture. Unsalted is preferred so you control the salt content.
- Vanilla extract: A touch of vanilla enhances the chocolate flavor beautifully.
- Mini marshmallows: These are perfect for melting quickly to create those dreamy swirls.
- A pinch of salt: Balances the sweetness and deepens the chocolate flavor.
Directions to Follow
Here’s a step-by-step guide to making your perfect Marshmallow Swirl Fudge:
- Prep Your Pan: Line an 8×8-inch baking pan with parchment paper or foil, leaving an overhang on the sides. Lightly grease the paper/foil with butter or non-stick spray. This will make removing the fudge incredibly easy.
- Combine Chocolate Base Ingredients: In a medium-sized heavy-bottomed saucepan, combine the chocolate chips, sweetened condensed milk, butter, and salt.
- Melt and Stir: Place the saucepan over low to medium-low heat. Stir constantly with a heatproof spatula or wooden spoon until the chocolate and butter are completely melted and the mixture is smooth and glossy. This usually takes about 5-7 minutes. Be careful not to scorch the chocolate.
- Remove from Heat & Add Vanilla: Once smooth, remove the pan from the heat and stir in the vanilla extract until well combined.
- Pour First Layer: Immediately pour about two-thirds of the chocolate fudge mixture into the prepared baking pan, spreading it evenly with your spatula.
- Melt Marshmallows: Place the remaining one-third of the chocolate fudge back over very low heat (or in a microwave-safe bowl, heating in 15-second intervals). Quickly stir in the mini marshmallows until they are
just melted and mostly smooth. Don’t overcook or they’ll become too sticky.
- Create the Swirl: Dollop spoonfuls of the melted marshmallow-chocolate mixture over the fudge in the pan. Using a knife or a skewer, gently swirl the marshmallow mixture into the chocolate base. Don’t overmix, or your swirls will disappear. Aim for distinct ribbons.
- Chill to Set: Place the pan in the refrigerator for at least 2-4 hours, or until the fudge is completely firm.
- Cut and Serve: Once firm, use the parchment paper overhang to lift the fudge out of the pan. Place it on a cutting board and cut it into 1-inch squares.
What to Serve It With
Marshmallow Swirl Fudge is a star all on its own, but there are definitely ways to enhance the experience! For a simple dessert, serve squares alongside a hot cup of coffee or a tall glass of milk. During the holidays, arrange it on a festive platter with other homemade cookies and candies. It also makes a fantastic addition to a dessert board, contrasting beautifully with fresh fruit, nuts, and perhaps some cheese. For an extra indulgent treat, try crumbling a piece over a scoop of vanilla bean ice cream or even incorporating it into a s’mores-inspired dessert dip.
Keeping Leftovers Fresh
Storing your Marshmallow Swirl Fudge properly is key to maintaining its deliciousness and texture. Once cooled and cut, store the fudge in an airtight container at room temperature for up to 1-2 weeks. If your kitchen is particularly warm, you can store it in the refrigerator, but allow it to come to room temperature for about 15-20 minutes before serving for the best texture.
For longer storage, Marshmallow Swirl Fudge freezes beautifully. Wrap individual pieces or layers of fudge tightly in plastic wrap, then place them in an airtight freezer-safe container or bag. It will keep well in the freezer for up to 3 months. To thaw, simply transfer it to the refrigerator overnight or let it sit at room temperature for a few hours.
Pro Chef Tips
Making perfect fudge doesn’t have to be intimidating. Here are my top 7 tips for flawless Marshmallow Swirl Fudge every time:
- Use a Heavy-Bottomed Pan: This distributes heat more evenly and prevents the chocolate from scorching, which can lead to a grainy texture.
- Stir Constantly: When melting the chocolate mixture, constant stirring ensures even melting and prevents burning on the bottom of the pan.
- Don’t Overcook: Once the chocolate and butter are melted and smooth, remove the pan from the heat immediately. Continuing to cook can cause the fudge to become dry and crumbly.
- Work Quickly with Marshmallows: Marshmallows become very sticky and difficult to work with if overcooked. Melt them just until smooth and then work fast to swirl them in.
- Optimal Swirling: Don’t swirl too much! A few gentle passes with a knife or skewer are enough. Over-swirling will blend the colors completely, and you’ll lose the beautiful marbled effect.
- Parchment Paper is Your Friend: Lining your pan with parchment paper or foil (with an overhang) makes removing the set fudge incredibly easy and mess-free. Don’t skip this step!
- Chill Thoroughly: Resist the urge to cut into the fudge before it’s fully set. Chilling for at least 2-4 hours (or even overnight) ensures it’s firm enough for clean, sharp cuts.
Creative Twists
While the classic Marshmallow Swirl Fudge is delightful, there are so many ways to customize it!
- Nutty Swirl: Before pouring the fudge into the pan, stir in 1/2 cup of chopped nuts like walnuts, pecans, or almonds into the chocolate base.
- Minty Fresh: Add 1/2 teaspoon of pure peppermint extract along with the vanilla for a festive mint-chocolate version. A few drops of green food coloring in the marshmallow swirl can enhance the effect.
- Spiced Swirl: For a warm, comforting twist, add 1/4 teaspoon of cinnamon or a pinch of cayenne pepper to the chocolate base for a subtle kick.
- Espresso Boost: Dissolve 1 teaspoon of instant espresso powder in the melted butter before adding the chocolate chips to intensify the chocolate flavor without making it taste like coffee.
- White Chocolate Marshmallow: Instead of semi-sweet, use good quality white chocolate chips for the base, then use milk chocolate for the swirl for a dramatic contrast.
Your Questions Answered
FAQ
Q: My fudge turned out grainy. What went wrong?
A: Grainy fudge is often caused by overcooking the chocolate mixture or not stirring constantly enough, leading to sugar crystals forming. Ensure you use low heat, stir continuously until just melted, and remove it from the heat as soon as it’s smooth.
Q: Can I use marshmallow crème instead of mini marshmallows for the swirl?
A: Yes, you can! If using marshmallow crème, you won’t need to melt it with extra chocolate from the base. Simply dollop and swirl the crème directly onto the chocolate fudge in the pan. It will yield a slightly different texture, usually finer and silkier.
Q: How do I get really clean cuts for my fudge?
A: Make sure your fudge is thoroughly chilled and firm. Use a large, sharp knife, and run it under hot water, wiping it dry between each cut. This helps prevent sticking and ensures smooth, neat squares.
Heavenly Marshmallow Swirl Fudge Delights
Equipment
- 8×8 inch square baking dish
- parchment paper
- large, heavy-bottomed saucepan
- butter knife or skewer
- cutting board
Ingredients
Fudge Base
- 14 ounce sweetened condensed milk
- 12 ounces semi-sweet chocolate chips good quality makes a difference!
- 1/2 cup unsalted butter
- 1 teaspoon vanilla extract
- Pinch salt
Marshmallow Swirl
- 7 ounces marshmallow creme or 2 cups mini marshmallows, melted
Instructions
Preparation
- Line an 8×8 inch baking dish with parchment paper, allowing an overhang to easily remove the fudge later.
Cooking
- In a large saucepan over medium-low heat, melt the sweetened condensed milk, chocolate chips, and butter, stirring until smooth and glossy.
- Remove from heat, then stir in the vanilla extract and salt until well combined.
- Pour the chocolate mixture evenly into the prepared baking dish.
- Drop spoonfuls of marshmallow creme over the hot fudge, or drizzle with melted mini marshmallows if using.
- Gently swirl the marshmallow into the chocolate fudge with a knife or skewer, aiming for distinct ribbons rather than overmixing.
Finishing
- Refrigerate the fudge for at least 2-3 hours until it is completely firm.
- Lift the fudge from the pan using the parchment paper, then cut into 1-inch squares and serve.