My first encounter with Red Velvet Kiss Cookies was at a holiday potluck, and I was instantly smitten. These weren’t your average cookies; they were vibrant, soft, and had that irresistible chocolate kiss surprise in the middle. It felt like biting into a little piece of festive magic. Since then, I’ve been on a quest to bake the perfect batch, and let me tell you, there are many delightful paths to achieve red velvet cookie greatness. This article isn’t just about one recipe; it’s a celebration of five fantastic ways to make these show-stopping treats, ensuring you’ll find your ultimate favorite.
Why You’ll Love This Dish
Red Velvet Kiss Cookies are more than just a pretty face – they’re a symphony of texture and flavor that makes them utterly irresistible. If you’re looking for a dessert that truly stands out, here’s why these cookies should be at the top of your baking list:
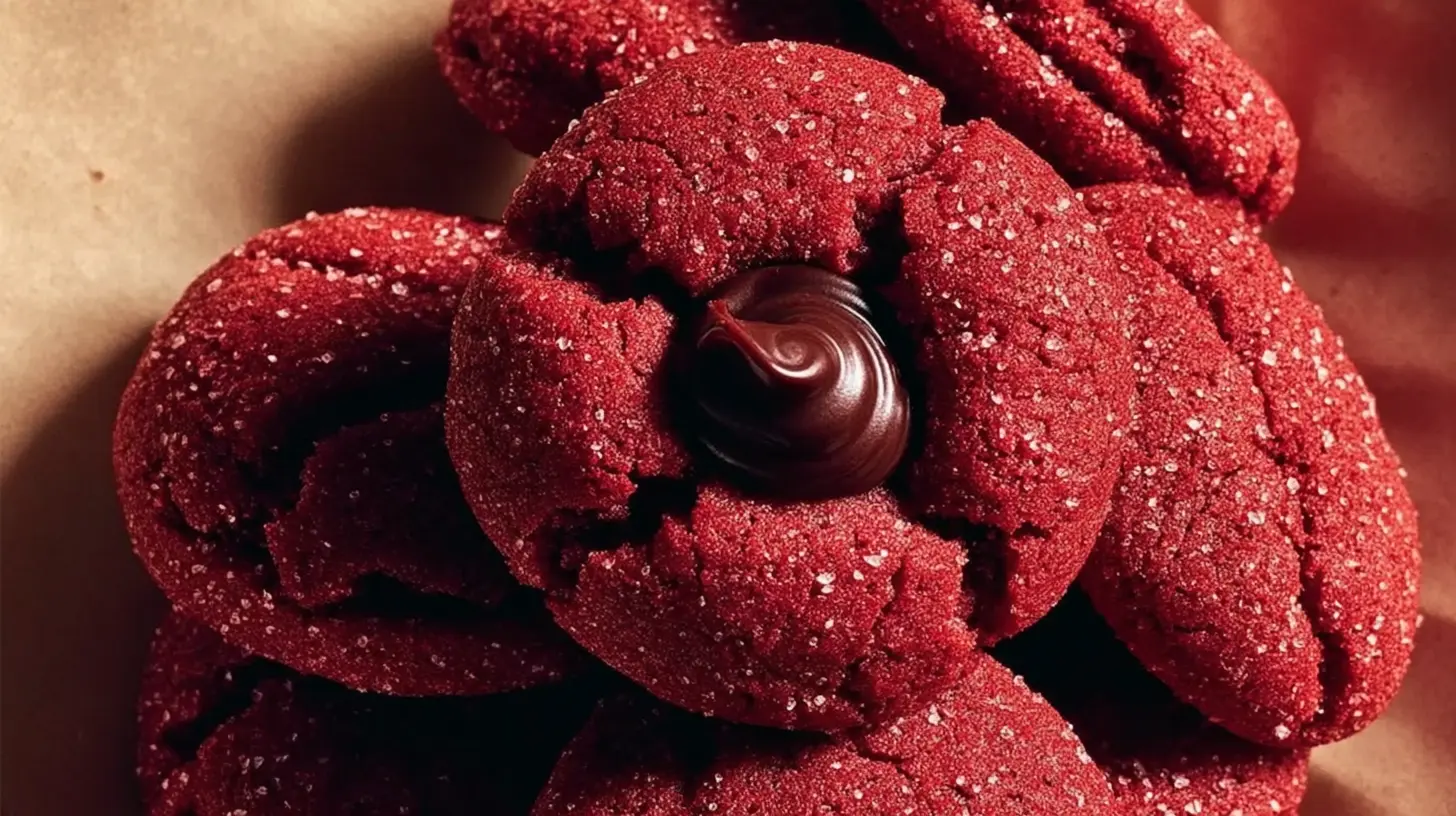
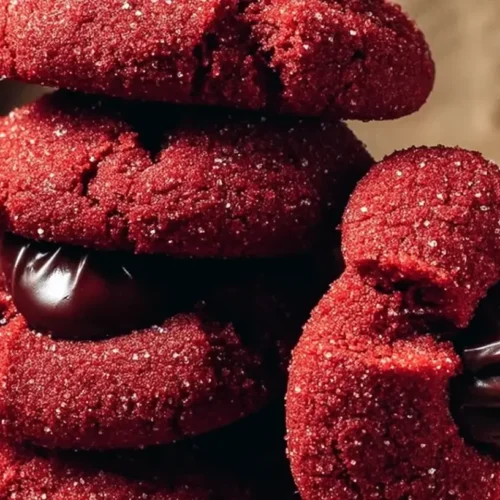
- Visually Stunning: That deep red hue, contrasted with the milk chocolate Hershey’s Kiss, makes for an incredibly attractive cookie that’s perfect for holiday platters, bake sales, or just brightening up a regular Tuesday.
- Irresistible Flavor Profile: The subtle cocoa and vanilla notes, often complemented by a touch of tang from buttermilk or cream cheese (depending on the recipe), create a complex and satisfying taste that’s unique to red velvet.
- Perfectly Portioned: Each cookie is a delightful, single-serving treat, making them easy to grab and enjoy without any fuss.
- Fun to Make: The process of rolling them in powdered sugar and pressing in the chocolate kiss is genuinely enjoyable, especially if you’re baking with kids.
- Versatile for Any Occasion: While they scream “holiday,” these cookies are wonderful year-round. They fit right in at birthday parties, baby showers, or simply as a comforting after-dinner treat.
> “I baked these Red Velvet Kiss Cookies for a school event, and they were the first thing to disappear! Everyone asked for the recipe. They’re so vibrant and taste even better than they look.”
The Cooking Process Explained
Making Red Velvet Kiss Cookies generally follows a straightforward baking process, but each of our 5 recipes offers unique nuances that produce slightly different textures and flavor depths. Typically, you’ll start by creaming together butter and sugar until light and fluffy. Then, wet ingredients like eggs, vanilla, and crucially, that vibrant red food coloring, are incorporated. Dry ingredients – flour, cocoa powder, baking soda, and salt – are then gradually mixed in. Some recipes might call for buttermilk or even cream cheese in the dough for added moisture and tang. Once the dough is formed, it’s often chilled, then rolled into balls, sometimes coated in powdered sugar, and baked. The magical part? The chocolate kiss is pressed into the warm cookies right after they come out of the oven, melting slightly to create that iconic “kiss” indentation.
What You’ll Need
Recipe 1: Classic Red Velvet Kiss Cookies
- 2 ½ cups all-purpose flour
- ¼ cup unsweetened cocoa powder
- 1 teaspoon baking soda
- ¼ teaspoon salt
- 1 cup (2 sticks) unsalted butter, softened
- 1 ½ cups granulated sugar
- 2 large eggs
- 1 teaspoon vanilla extract
- 1 tablespoon red food coloring (liquid or gel)
- ½ cup buttermilk
- Powdered sugar, for rolling
- 4 dozen Hershey’s Kisses, unwrapped
Recipe 2: Cream Cheese Swirl Red Velvet Kisses (Dough-based cream cheese)
- 2 cups all-purpose flour
- ¼ cup unsweetened cocoa powder
- 1 teaspoon baking soda
- ¼ teaspoon salt
- ¾ cup (1 ½ sticks) unsalted butter, softened
- 1 cup granulated sugar
- 4 oz cream cheese, softened
- 1 large egg
- 1 teaspoon vanilla extract
- 1 tablespoon red food coloring
- Powdered sugar, for rolling
- About 3 dozen Hershey’s Kisses, unwrapped
Recipe 3: Deep Red Velvet Crinkle Kisses
- 2 cups all-purpose flour
- ½ cup unsweetened cocoa powder
- 1 teaspoon baking powder
- ½ teaspoon baking soda
- ¼ teaspoon salt
- ½ cup (1 stick) unsalted butter, softened
- 1 ½ cups granulated sugar
- 2 large eggs
- 1 teaspoon vanilla extract
- 1 tablespoon red gel food coloring
- ½ cup milk
- ½ cup confectioners’ sugar (powdered sugar), for rolling
- About 3-4 dozen Hershey’s Kisses, unwrapped
Recipe 4: Chewy Red Velvet Kiss Cookies (Oil-based for chewiness)
- 2 cups all-purpose flour
- ¼ cup unsweetened cocoa powder
- 1 teaspoon baking soda
- ¼ teaspoon salt
- ½ cup vegetable oil
- 1 ½ cups granulated sugar
- 2 large eggs
- 1 teaspoon vanilla extract
- 1 tablespoon red food coloring
- 2 tablespoons milk
- Powdered sugar, for rolling
- About 3 dozen Hershey’s Kisses, unwrapped
Recipe 5: Quick Red Velvet Cake Mix Kisses
- 1 (15.25 oz) box red velvet cake mix
- ½ cup vegetable oil
- 2 large eggs
- 1 teaspoon vanilla extract (optional, but recommended)
- Powdered sugar, for rolling
- About 3 dozen Hershey’s Kisses, unwrapped
Directions to Follow
Common Steps (apply to most recipes):
- Prep: Preheat oven to 350°F (175°C). Line baking sheets with parchment paper. Unwrap Hershey’s Kisses and set aside.
- Combine Dry Ingredients: In a medium bowl, whisk together flour, cocoa powder, baking soda, and salt. Set aside.
- Cream Wet Ingredients: In a large bowl with an electric mixer, beat softened butter (or oil for Recipe 4), granulated sugar, and cream cheese (if applicable) until light and fluffy. Beat in eggs one at a time, then vanilla extract and red food coloring.
- Combine Wet and Dry: Gradually add the dry ingredients to the wet ingredients, mixing on low speed until just combined. For recipes using buttermilk or milk, alternate adding dry ingredients with the liquid, beginning and ending with dry.
- Chill Dough (Optional but Recommended): For easier handling and less spreading, cover the dough and chill for at least 30 minutes, or longer for firmer dough.
- Roll Cookies: Scoop dough into 1-inch balls. Roll each ball in powdered sugar until fully coated. Place 2 inches apart on prepared baking sheets.
- Bake: Bake for 8-10 minutes, or until edges are lightly set but the centers are still soft. Do not overbake!
- Add Kisses: Immediately upon removing from the oven, gently press a Hershey’s Kiss into the center of each warm cookie. The chocolate will soften.
- Cool: Let cookies cool on the baking sheets for 5-10 minutes before transferring to a wire rack to cool completely. This allows the chocolate to set.
Specific Notes for Each Recipe:
- Recipe 1 (Classic): Ensure buttermilk is at room temperature.
- Recipe 2 (Cream Cheese Swirl): Make sure both butter and cream cheese are very soft for a smooth texture.
- Recipe 3 (Crinkle): The extra cocoa powder enhances the crinkle effect against the powdered sugar.
- Recipe 4 (Chewy): The oil gives a distinct chewy texture; ensure you don’t overmix the dough.
- Recipe 5 (Cake Mix): Simply combine all ingredients (cake mix, oil, eggs, vanilla) until a soft dough forms. No need to chill this dough typically.
How to Serve Red Velvet Kiss Cookies
These vibrant Red Velvet Kiss Cookies are a showstopper on their own, but a few creative touches can elevate their presentation and enjoyment even further.
- Classic Platter: Arrange them artfully on a white or silver platter during the holidays for a stunning visual contrast.
- With a Warm Drink: Pair them with a steaming mug of hot cocoa, a vanilla latte, or a cold glass of milk for the ultimate comfort food experience.
- Dessert Bar Star: Include them on a dessert bar with other mini treats. Their striking color will instantly draw attention.
- Packaged Gifts: Stack a few in a cellophane bag tied with a festive ribbon for a beautiful homemade gift during the holidays or as a party favor.
- Mini Ice Cream Sandwiches: For an indulgent twist, once cooled, gently slice a cookie in half and place a small scoop of vanilla or cream cheese ice cream in between (though this might be messy with the kiss!).
- Crumble Topping: Crumbled Red Velvet Kiss Cookies make an amazing topping for vanilla ice cream, yogurt parfaits, or even a cream cheese frosting-topped cupcake.
Keeping Leftovers Fresh
Proper storage ensures your Red Velvet Kiss Cookies stay soft and delicious.
- Room Temperature: If you plan to consume them within 2-3 days, store the cooled cookies in an airtight container at room temperature. Place parchment paper between layers to prevent sticking, especially if the chocolate kisses are still soft.
- Refrigeration: While not strictly necessary, refrigerating can extend their freshness for up to a week. Again, an airtight container is key. Allow them to come closer to room temperature before serving for the best texture.
- Freezing: Red Velvet Kiss Cookies freeze beautifully!
- Place fully cooled cookies in a single layer on a baking sheet and flash freeze for about 30 minutes to an hour until firm.
- Transfer the flash-frozen cookies to a freezer-safe airtight container or heavy-duty freezer bag, layering with parchment paper.
- They will keep well for up to 2-3 months.
- To Thaw: Simply remove the desired number of cookies from the freezer and let them thaw at room temperature for an hour or two. Don’t reheat in the microwave unless you want a very melted kiss!
Helpful Cooking Tips
Achieving that perfect Red Velvet Kiss Cookie isn’t hard, but a few insider tips can make all the difference:
- Gel Food Coloring is Your Friend: While liquid food coloring works, gel food coloring provides a much more intense and vibrant red hue without adding too much extra moisture to your dough. A little goes a long way!
- Don’t Skimp on Chilling: Chilling the dough, especially for the non-cake mix recipes, is crucial. It helps prevent the cookies from spreading too much, makes them easier to handle and roll, and often results in a chewier texture.
- The Powdered Sugar Coat: When rolling in powdered sugar, make sure each ball is fully coated. This creates that beautiful crinkly, contrasting white exterior that makes red velvet cookies so appealing. Don’t press too hard, just a gentle roll.
- Timing is Everything for the Kiss: Press the Hershey’s Kisses into the cookies immediately after they come out of the oven. If you wait too long, the cookies will start to set, and the kiss won’t sink in nicely.
- Watch for Doneness: Red velvet cookies can be tricky to tell when they’re done because of their color. Look for edges that are just set and a center that looks slightly puffed and still soft. Overbaking will lead to dry, hard cookies.
- Room Temperature Ingredients: Always strive for room temperature butter, eggs, and cream cheese (if using). This allows them to cream together smoothly and incorporate air efficiently, leading to a lighter, more evenly textured cookie.
- Don’t Overmix: Once you add the flour, mix only until just combined. Overmixing develops the gluten, which can lead to tough cookies.
Flavor Swaps
While the classic Red Velvet Kiss Cookie is fantastic, these recipes are incredibly adaptable! Here are some creative twists to try:
- Chocolate Kiss Variations: Instead of classic milk chocolate Kisses, try dark chocolate Kisses, Hugs (white chocolate swirled with milk chocolate), caramel-filled Kisses, or even peppermint Kisses for a festive touch.
- Extract Adventures: Beyond vanilla, consider adding a touch of almond extract for a subtle nutty note, or a few drops of peppermint extract for a holiday twist (especially with peppermint Kisses!).
- Citrus Zest: A teaspoon of orange zest added to the dough can brighten the flavor beautifully, offering a lovely counterpoint to the cocoa.
- Spice It Up: For a warmer, cozier cookie, add a pinch of cinnamon or a tiny dash of cayenne pepper (the latter used very sparingly for a subtle “kick”).
- Mini Chocolate Chips: Fold a handful of mini chocolate chips into the dough for an extra burst of chocolate flavor throughout the cookie.
- Cream Cheese Frosting Drizzle: Instead of or in addition to the kiss, once completely cooled, drizzle the cookies with a simple cream cheese glaze for even more classic red velvet flavor.
- Nutty Crumble: Before baking, sprinkle a chopped pecan or walnut onto the top of the dough balls for added texture and flavor.
Common Questions
Why did my cookies spread too much?
A: This is usually due to butter that was too warm, not chilling the dough enough (or at all), or your oven temperature being too low. Ensure your butter is softened but not melted, and always chill the dough for at least 30 minutes.
My Hershey’s Kisses melted completely. What happened?
A: This can happen if the cookies were too hot, or if the kisses were pressed in too aggressively and too soon, allowing them to fully dissolve. While a slightly melted base is normal and desired, if they disappear entirely, try letting the cookies cool on the baking sheet for an extra 2-3 minutes before pressing in the kisses. Also, check your oven temperature to ensure it’s not running too hot.
Can I make these without food coloring?
A: Absolutely! They won’t have the “red velvet” appearance, but they will still be delicious chocolate kiss cookies. You might want to increase the cocoa powder slightly or use dark cocoa powder for a deeper chocolate flavor and darker color.
Can I use oil instead of butter in all the recipes?
A: While Recipe 4 specifically uses oil for a chewy texture, using oil in place of butter in other recipes will significantly change the taste and texture. Butter contributes to flavor and structure in ways oil doesn’t. If you need a dairy-free option, look for a recipe specifically formulated for oil or substitute with a solid shortening designed for baking.
How long do these cookies stay fresh?
A: Stored in an airtight container at room temperature, they are best enjoyed within 3-4 days. For longer storage, refer to the freezing guidelines above.
Classic Red Velvet Kiss Cookies
Equipment
- Baking sheets
- Parchment paper or silicone mats
- Medium bowl
- Large bowl
- Electric mixer
- Wire rack
Ingredients
Dry Ingredients
- 1 ½ cups all-purpose flour
- 2 tablespoons unsweetened cocoa powder
- 1 teaspoon baking soda
- ½ teaspoon salt
Wet Ingredients
- ½ cup unsalted butter softened to room temperature
- ½ cup granulated sugar
- ¼ cup light brown sugar packed
- large egg
- 1 teaspoon vanilla extract
- 2 teaspoons red gel food coloring good quality
- 1 teaspoon white vinegar
For Finishing
- 24 white chocolate kisses or similar white chocolate candies unwrapped
- ½ cup powdered sugar for rolling
Instructions
Preparation
- Preheat your oven to 350°F (175°C) and line two baking sheets with parchment paper or silicone mats.
- In a medium bowl, whisk together the flour, cocoa powder, baking soda, and salt; then set aside.
Making the Dough
- In a large bowl, cream softened butter, granulated sugar, and brown sugar with an electric mixer until light and fluffy (2-3 minutes).
- Beat in the egg and vanilla extract until just combined.
- Stir in the red gel food coloring and white vinegar until the color is evenly distributed and vibrant.
- Gradually add the dry ingredients to the wet ingredients, mixing on low speed until just combined, being careful not to overmix.
- If the dough is too soft, chill it in the refrigerator for 20-30 minutes to make handling easier and prevent spreading.
Baking and Finishing
- Place powdered sugar in a shallow bowl; scoop rounded tablespoons of dough, roll into balls, and coat thoroughly in the sugar.
- Arrange dough balls 2 inches apart on baking sheets; bake for 8-10 minutes until edges are set and centers are slightly soft (do not overbake).
- Immediately press one unwrapped white chocolate kiss into the center of each warm cookie.
- Cool cookies on baking sheets for 5-10 minutes, then transfer to a wire rack to cool completely.