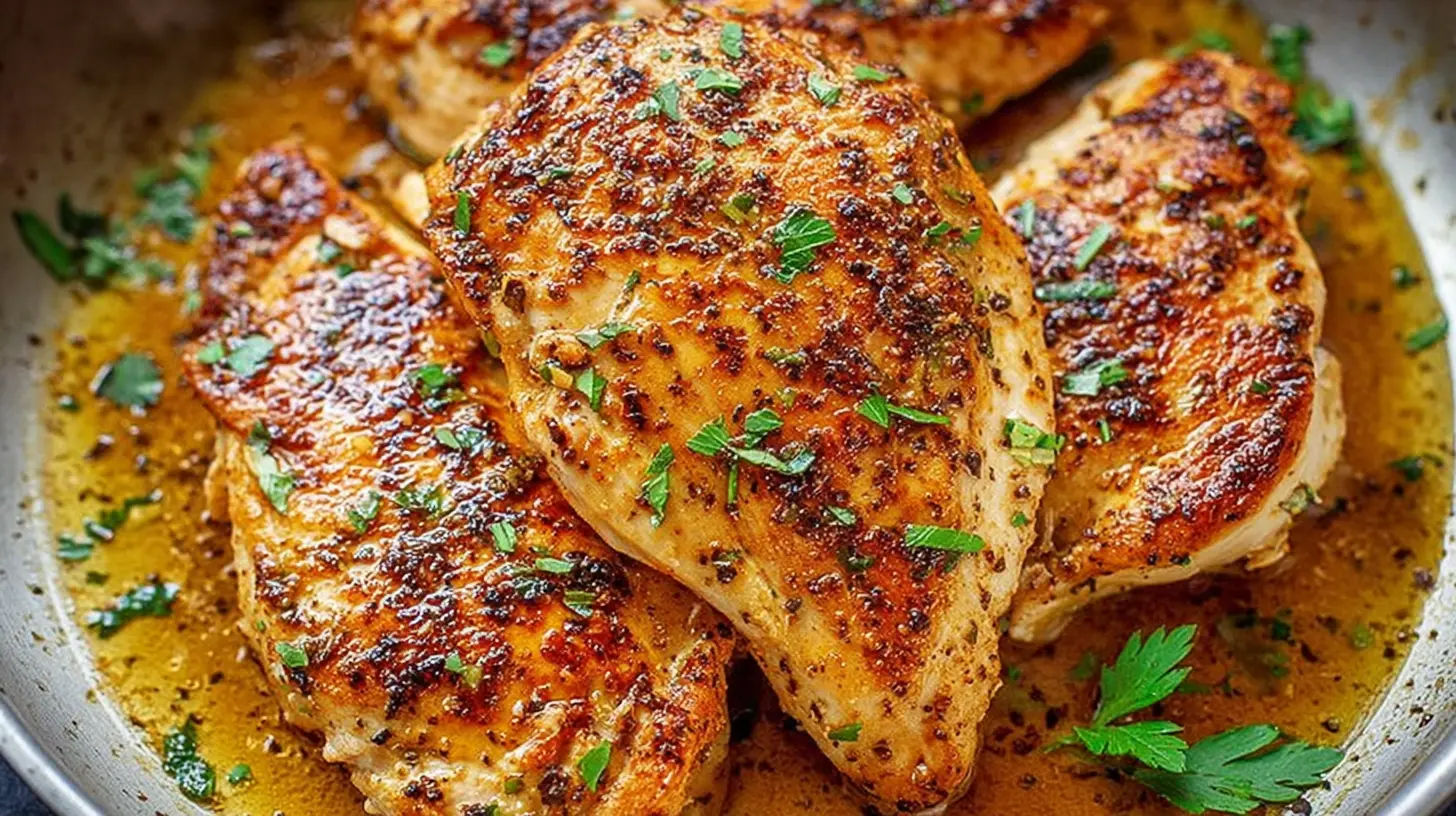
I remember countless evenings staring blankly into the fridge, utterly drained after a long day, with that familiar “what’s for dinner?” dread creeping in. More often than not, a package of chicken breasts would be staring back, promising potential but often delivering bland, dry disappointment. That is, until I cracked the code to a truly simple, perfectly juicy pan-fried chicken breast. This isn’t just another recipe; it’s a lifesaver for busy weeknights, a secret weapon for tender, flavorful chicken that comes together in a mere 10 minutes.
Why You’ll Love This Dish
Let’s be honest, who doesn’t need a reliable, delicious, and lightning-fast dinner option in their repertoire? This Simple Pan-Fried Chicken Breast Recipe ticks all those boxes and more. It’s perfect for those chaotic weeknights when you’re short on time but still want a healthy, homemade meal. Beyond its speed, the beauty of this dish lies in its versatility. You can pair it with almost anything, making it a fantastic base for countless meals. It’s also incredibly budget-friendly and requires minimal cleanup, which is always a win in my book!
> “I thought all chicken breast was destined to be dry. This recipe completely changed my mind! So quick and incredibly juicy.”
The Cooking Process Explained
Before we dive into the specifics, let’s get a bird’s-eye view of how this magic happens. First, you’ll want to get your chicken prepped – think thin and even for quick cooking. Then, a quick season with salt and pepper is all it takes to start building flavor. Next, a hot pan with a touch of oil creates that beautiful golden-brown crust. A swift sear on each side, a little finesse with the heat, and a moment to rest, and voilà – perfectly cooked chicken breast ready to enjoy. It’s truly that straightforward!
What You’ll Need
To whip up this effortless meal, gather these simple items:
- Chicken Breasts: 2 boneless, skinless, about 6-8 oz each. Opt for organic or free-range if possible for the best flavor and texture.
- Olive Oil: 1-2 tablespoons. A good quality extra virgin olive oil works wonderfully for pan-frying.
- Salt: ½ teaspoon, or to taste. I prefer sea salt for its coarser texture and cleaner taste.
- Black Pepper: ¼ teaspoon, freshly ground, or to taste. Freshly ground makes a big difference!
- Optional Seasonings: Garlic powder, paprika, onion powder, or your favorite all-purpose seasoning blend can be added for extra flavor.
Directions to Follow
Ready to get cooking? Here’s how to achieve perfectly pan-fried chicken every time:
- Prepare the Chicken: Pat the chicken breasts very dry with paper towels. This is a crucial step for achieving a nice sear! If the chicken breasts are very thick, you can butterfly them or pound them to an even ¾-inch thickness. This ensures they cook quickly and evenly.
- Season Generously: Sprinkle both sides of the chicken breasts evenly with salt, black pepper, and any other desired seasonings. Don’t be shy – this is where the flavor comes from!
- Heat the Pan: Place a large skillet (cast iron or stainless steel works best) over medium-high heat. Add the olive oil and let it heat until it shimmers and just begins to smoke lightly. This hot pan is key for that initial sear.
- Sear the Chicken: Carefully place the seasoned chicken breasts in the hot pan. Don’t overcrowd the pan; cook in batches if necessary. Let them cook undisturbed for 3-5 minutes, until a beautiful golden-brown crust forms.
- Flip and Finish: Flip the chicken breasts and reduce the heat to medium. Cook for another 3-5 minutes on the second side, or until the internal temperature reaches 165°F (74°C) with an instant-read thermometer. The cooking time will depend on the thickness of your chicken.
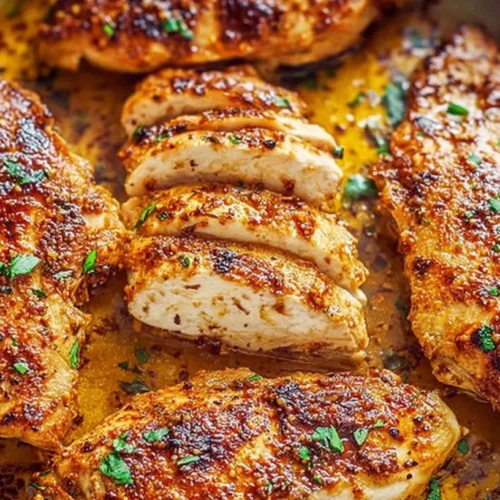
- Rest: Remove the chicken from the pan and transfer it to a cutting board. Tent it loosely with foil and let it rest for 5 minutes. This resting period is vital for the juices to redistribute, resulting in incredibly tender and moist chicken.
- Serve: Slice against the grain, if desired, and serve immediately.
Best Ways to Enjoy It
The beauty of this Simple Pan-Fried Chicken Breast is its amazing versatility! For a quick weeknight meal, I often slice it and serve it over a bed of fluffy quinoa with a side of steamed green beans. It’s also fantastic diced up and added to a fresh garden salad for a protein-packed lunch. Consider pairing it with roasted vegetables like asparagus or broccoli, or alongside some creamy mashed potatoes. For a slightly different twist, you could even shred it for quick chicken tacos or stir into a pasta dish. A squeeze of fresh lemon juice over the top just before serving adds a lovely bright finish!
How to Store & Freeze
Should you miraculously have any leftovers (it’s rare with this one!), proper storage is key to maintaining freshness and safety.
- Refrigeration: Allow the cooked chicken to cool completely, then transfer it to an airtight container. It will keep well in the refrigerator for up to 3-4 days.
- Reheating: To reheat, slice the chicken and gently warm it in a skillet over medium-low heat with a splash of water or broth to prevent drying out. You can also microwave in short bursts, but be careful not to overcook.
- Freezing: Cooked chicken breast freezes beautifully. Once cooled, place individual portions in freezer-safe bags or containers. It will last for up to 2-3 months. Thaw overnight in the refrigerator before reheating.
Helpful Cooking Tips
Achieving that perfectly juicy, tender chicken every time isn’t hard, but a few pro tips can elevate your game:
- Even Thickness is Key: As mentioned, if your chicken breasts are uneven, either butterfly them or pound them gently with a meat mallet (between two pieces of plastic wrap) to an even thickness. This ensures consistent cooking and prevents dry spots.
- Don’t Overcrowd the Pan: Give your chicken breasts some space! If you put too many in the pan at once, the temperature will drop, and the chicken will steam instead of sear, resulting in a less pleasant texture. Cook in batches if needed.
- Pat Dry, Always Dry: This bears repeating. Moisture on the surface of the chicken prevents a good sear. Always pat your chicken thoroughly dry with paper towels before seasoning.
- Rest is Best: Don’t skip the resting step! It allows the muscle fibers to relax and reabsorb juices, making for a much more succulent piece of chicken.
- Know Your Pan: Different pans conduct heat differently. Get to know how your skillet heats up. Cast iron holds heat incredibly well, while stainless steel is also excellent for searing.
Creative Twists
While this recipe is fantastic as is, there are endless ways to customize your pan-fried chicken:
- Herb Infusion: Add fresh rosemary, thyme, or oregano sprigs to the pan during the last few minutes of cooking for an aromatic flavor boost.
- Spicy Kick: Sprinkle with a pinch of cayenne pepper or red pepper flakes along with the salt and pepper.
- Garlic Butter Finish: After cooking, remove the chicken, then add a tablespoon of butter and a minced garlic clove to the hot pan. Cook for 30 seconds until fragrant, then spoon this delicious sauce over the rested chicken.
- Lemon-Dill: Finish with a squeeze of fresh lemon juice and a sprinkle of fresh dill for a bright, refreshing flavor profile.
- Breaded Option: For a crispy exterior, dredge the chicken in seasoned flour, then egg, then breadcrumbs before pan-frying. Adjust cooking time accordingly for a thicker coating.
Common Questions
How do I know when the chicken is cooked through?
The best way to tell is by using an instant-read meat thermometer. Insert it into the thickest part of the chicken breast; it should read 165°F (74°C). The juices should also run clear when you pierce it with a knife.
Can I use bone-in chicken breasts for this recipe?
While you technically can, bone-in chicken breasts will take significantly longer to cook and may not achieve the “10-minute meal” promise. This recipe is optimized for boneless, skinless chicken breasts pounded to even thickness.
My chicken keeps sticking to the pan. What am I doing wrong?
There are a few culprits here:
- Pan not hot enough: Ensure your pan is properly preheated before adding the chicken.
- Not enough oil: A thin layer of oil is necessary to create a non-stick surface.
- Flipping too soon: Let the chicken develop a good crust before attempting to flip. It should release easily from the pan when it’s ready. If it’s sticking, give it another 30 seconds to a minute before trying to flip again.
What are good substitutions for olive oil?
You can use other oils with a high smoke point, such as avocado oil, grapeseed oil, or canola oil. Butter can also be used for flavor, but be mindful that it has a lower smoke point, so you might want to mix it with a little oil.
Simple Pan-Fried Chicken Breast Recipe
Equipment
- Plastic wrap
- Meat mallet or rolling pin
- Small bowl
- Heavy-bottomed skillet (cast iron or stainless steel)
- Instant-read thermometer
- Cutting board
Ingredients
Main Ingredients
- 2 chicken breasts Boneless, skinless
- 1 tablespoon olive oil (or avocado oil)
- 1/2 teaspoon kosher salt
- 1/4 teaspoon black pepper
- 1/2 teaspoon garlic powder
- 1/2 teaspoon smoked paprika (optional)
- 1 tablespoon unsalted butter (optional)
Instructions
Instructions
- Pound each chicken breast to an even 3/4-inch thickness between plastic wrap using a meat mallet or rolling pin.
- Combine salt, pepper, garlic powder, and smoked paprika in a small bowl, then season both sides of the chicken breasts evenly.
- Heat olive oil in a heavy-bottomed skillet over medium-high heat until hot but not smoking.
- Place chicken in the hot pan and sear undisturbed for 3-5 minutes until a golden-brown crust forms.
- Flip the chicken, add butter if desired, and cook for another 3-5 minutes until the internal temperature reaches 165°F (74°C).
- Transfer the cooked chicken to a cutting board and let it rest for at least 5 minutes before slicing.
- Slice the chicken against the grain and serve immediately.