I remember those frantic back-to-school mornings well – wrestling with cowlicks, negotiating braids, and trying to make sure everyone looked presentable before the bus arrived. It felt like a daily battle! That’s why, as a parent myself, I’ve come to appreciate the power of a great back-to-school haircut. It’s not just about looking good; it’s about setting the tone for stress-free mornings and giving kids a confidence boost.
Why You’ll Love These Haircut Ideas
Let’s be honest, mornings are already a whirlwind. Adding complex hairstyling to the mix just isn’t sustainable. This is precisely why finding the right “back to school haircut” can be a game-changer. These four styles aren’t just trendy; they’re chosen for their practicality, ease of maintenance, and ability to keep kids looking neat and feeling good all day long. They free up precious time, reduce hair-related meltdowns, and ensure your child starts their day feeling fresh and ready to learn.
> “I used to dread school mornings because of hair drama. After trying one of these low-maintenance cuts, it’s been a complete turnaround. Quick, easy, and my son actually cooperates now!” – A happy parent’s review.
Back to School Haircuts: A Step-by-Step Overview
While you won’t be cutting the hair yourself (unless you’re a professional!), understanding the general principle behind these styles can help you communicate better with your stylist and pick the perfect look. The focus for these back-to-school cuts is always functionality coupled with style. We’ll explore options that range from easy wash-and-go styles to slightly more structured looks that still require minimal daily effort. The goal is always a neat appearance that can withstand playground antics and still look great by dismissal.
What You’ll Need for Great Back to School Haircuts
It’s less about ingredients and more about preparation here! When heading to the salon or barbershop for a back-to-school cut, here’s what you’ll need:
- Clear Communication: Have a few reference photos ready. Words can be misinterpreted, but a picture truly is worth a thousand words – especially in a barbershop.
- Your Child’s Input (where appropriate): If your child is old enough, let them have some say. They’re the one wearing the hair, after all!
- Patience: Especially with younger kids, a trip to the salon can be an adventure.
- Hair Products (Post-Cut): Think about what you’ll need to maintain the chosen style. This might include a good detangling spray, a light styling cream, or simply a quality brush.
Directions to Follow (for the Hairdresser!)
When discussing these cuts with your stylist, here’s what to keep in mind for each of our top 4 recommendations:
- The Classic Bob/Lob (Girls):
- Request: A blunt cut (or slightly layered for texture) at chin or shoulder length.
- Key Detail: Discuss bangs – full, wispy, or none at all, depending on your child’s hair type and face shape.
- Why it works: Super easy to wash and comb, minimal styling, looks neat all day.
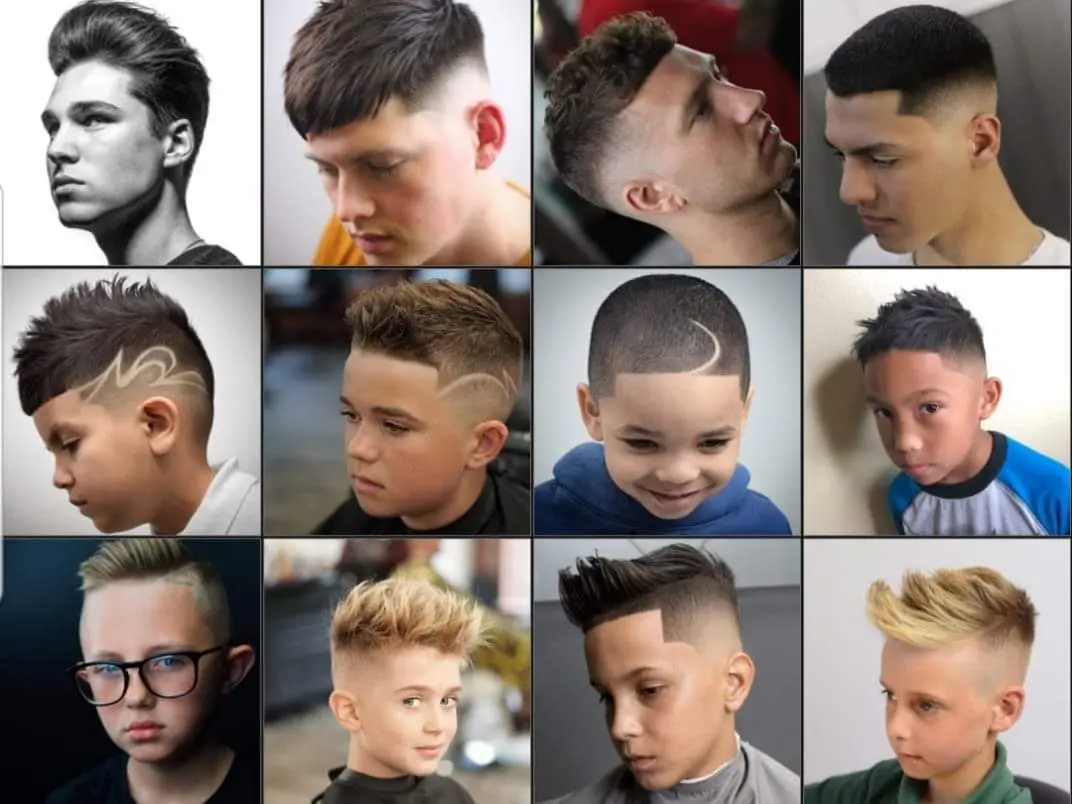
- The Textured Crop (Boys):
- Request: Shorter on the sides and back, with slightly more length and texture on top.
- Key Detail: Ask for a tapered or faded look on the sides, but keep it gradual for a softer, age-appropriate finish.
- Why it works: Low maintenance, cool, and can be styled with a tiny bit of product or left natural. It grows out well.
- The Long Layers (Girls):
- Request: Long hair with layers around the face to add shape and reduce bulk, while maintaining length.
- Key Detail: Emphasize face-framing layers that can be pulled back easily.
- Why it works: Versatile for ponytails, braids, or worn down, without looking heavy. Easier to manage than a single-length long cut.
- The Side Part with Taper (Boys):
- Request: A classic side part, with the top left long enough to comb over, and the sides tapered
Fast & Fabulous School-Ready Hairstyles
Equipment
- Hairbrush or wide-tooth comb
- Hair ties or elastic bands
- Bobby pins or small clips
- Water spray bottle
- Wide-barrel curling iron
Ingredients
Hair Essentials
- Hairbrush or wide-tooth comb
- Hair ties/elastic bands small, clear ones
- Bobby pins or small clips
- Hair gel, mousse, or leave-in conditioner optional
- Water spray bottle
- Ribbons or headbands optional
- Wide-barrel curling iron optional for “The Classic High Ponytail with a Twist”
- Texturizing spray optional, for fine hair
- Dry shampoo optional, for refreshing
- Silk or satin pillowcase/bonnet optional, for overnight care
Instructions
The Classic High Ponytail with a Twist
- Brush all hair upwards towards the crown of your head, then secure it with a hair tie.
- Take a small section from the underside of the ponytail, wrap it around the hair tie to conceal it, and secure the end with a bobby pin.
The Easy Braided Headband
- Part your hair down the middle or slightly to the side.
- On one side, start a French braid near the temple, braiding along the hairline back towards the ear.
- Once past the ear, continue with a regular three-strand braid to the end.
- Repeat on the other side, then bring both braids across the top of your head like a headband and pin them securely behind the opposite ear.
The Chic Fishtail Braid
- Gather your hair into a low ponytail or leave it down, then divide it into two equal sections.
- Alternate taking a small strand from the outside of one section and crossing it over to join the other section.
- Continue this pattern until you reach the end of the hair, then secure with a hair tie.
The Sweet Half-Up Top Knot
- Section off the top half of your hair from the temples to the crown and gather it into a high ponytail.
- Twist the ponytail around itself to form a bun, securing it with another hair tie or bobby pins.
- Leave the rest of the hair down, either straight or wavy.
The Double French Braids
- Create a clean part down the middle of your head, from forehead to nape, and clip one side out of the way.
- On the unclipped side, start a French braid at the hairline, incorporating new sections as you move downwards and then straight back.
- Continue braiding all the way down and secure with a hair tie; repeat on the other side.